• Skip to main content
Help Center

Help Center

Uncategorized

Create a Use case Asset


The Use case Asset helps you to build an end-to-end journey by connecting one or more Classifier and Extractor Assets built from the platform. It provides a drag and drop  and low code experience and various tool palettes to build a document workflow.

User must have any one of the following policies to create a Use case Asset

  • Administrator Policy
  • Creator Policy

This guide will walk you through the below steps on how to create your first Use Case Asset.

  1. Create an asset
  2. Define workflow
  3. Publish the asset

Step 1: Create an asset

You can create use cases using our Asset Studio. 

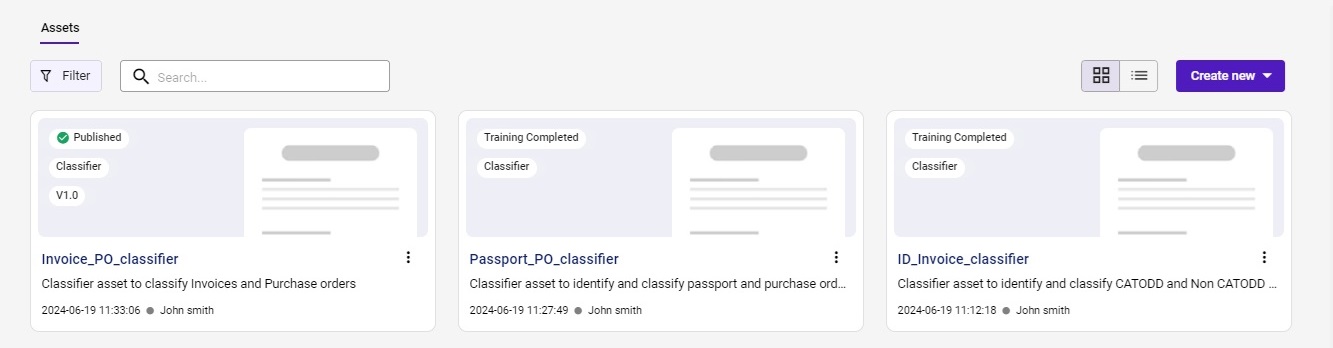
  1. Head to the Asset Studio page, click Create new, and then choose Usecase. 


  2. In the Usecase window that appears, enter a unique Asset name,


  3. Optional: Enter a brief Description of the Asset and upload an image.


  1. In Asset Visibility, choose any one of the following options.
    • All Users (default): Choose this option to share the asset with everyone in the platform who has the appropriate permissions to view and manage the asset.
    • Private: Choose this option to ensure that only you, the owner, can view and manage the asset. 
  2. Click Create and proceed to the Define workflow. 

Step 2: Define workflow

On the left side of the page, you will see the following components:

  • Connector
  • Classifier
  • Extractor
  • Flow control
  • Transform

By utilizing these components, you can create various use cases by simply dragging and dropping them onto the canvas and connecting them together.

Choose connectors

Connectors facilitate easy connection to data sources, allowing you to upload and download the required documents and perform bulk operations.

  1. In the list bar, click Connector.


  2. In the Connector window that appears, choose the connector that you wish to add against this Use case.


  3. Choose the required connector for ingesting the data. For more information about how to use the connectors, see Choose Connectors.

Select assets

  1. Choose and drag and drop a classifier(s) on the canvas and link it to the S3 connector using icon. Only published assets will be available for selection.


  2. Double-click on the Asset that you added to the canvas.


  3. In the Asset pane that appears, choose any one of the following options:


    • All pages: Choose this option to consider all the pages from a document and make a decision to classify the document. 
    • Specific pages: Choose this option to consider only the pages that you specified and make a decision based on it to classify the document. 
  4. Choose and drag and drop an extractor(s) to on the canvas and link it to the S3 connector using icon. Only published assets will be available for selection.


  5. Double-click on the Asset that you added to the canvas.


  6. In the Asset pane that appears, choose any one of the following options:


    • All pages: Choose this option to consider all the pages from a document and extract the required information from all the pages.
    • Specific pages: Choose this option to consider only the pages that you specified and extract the information only from the specified pages. 

Define the flow control

Flow control defines how data flows through the different components of a document processing workflow, such as connectors, extractors, and classifiers. Path involves managing the sequence and execution of a use case based on predefined conditions (if-then-else). It helps to define the data flow among multiple assets and their respective attributes as parameters.

  1. Click on Flow Control and drag and drop the path definer on the canvas and link it to the classifier and/or extractor using icon.


  2. Double-click on Path to expand the right-hand side panel and click on New Path to define the flow based on various parameters such as document type or confidence score.
  3. Define the conditions for the newly created path and click on Save Properties.


  4. You can also define other Flow Controls., For more information, see Define Flow Control.

Define output

The Output definer enables you to consolidate the output for your use case and customize the name and data type for the field/table entities extracted from documents. This helps you customize the output to suit your specific requirements and preferences.

  1. Click on Transform and then drag and drop the Output definer on the canvas.


  2. Click on the output definer on the canvas. 
  3. Connect the classifier or extractor asset to the output definer using icon.


  4. Double click on the output definer and click on edit output to consolidate and define the output for your use-case.


  5. A new window will appear.


  6. Drag and drop desired extractor fields to consolidate and define the output for your use case.


  7.  You can rename the field/table entities and define the data type. Once done, click on Save. Now, navigate back to the use case design canvas and Save the use case by clicking on the Save button.

Step 3: Publish the asset

  1. On the Designer page, click  Publish.


  2. On the Publish page that appears, you can check the information pertaining to the Asset.


  3. Click Publish. The asset’s status changes to Published and can be viewed in the list of assets in the Asset Studio.


Note: Once the asset is published, you can download the API and its documentation. The API can be invoked independently or used within a specific use case. If you wish to consume this asset via API, see Consume an Asset via API page.

It is recommended to use URL aliases, if you wish to consume multiple versions of an Asset. It allows you to consume its different versions via a single API. For more information, see URL aliases.

You can also consume this asset in the Asset Monitor module. For more information, see Consume an Asset via Create Transaction page.

Consume an Asset via API


Consuming an Asset refers to the process of calling or using the Asset to perform a desired action or provide a particular functionality. In this context, it means utilizing an API to access a trained Document AI model to classify documents, extract information from them or consume as a use case.

Once the Asset is created and published, you will be able to invoke the asset using API. 

User must have any one of the following policies to Invoke an Asset Through API:

  • Administrator Policy
  • Creator Policy

This guide will walk you through the below steps on how to invoke your assets using an API.

  1. Activate an asset
  2. Download the API documentation
  3. Invoke an asset through API

Step 1: Activate the asset

Once an Asset is published, it can be activated in the Asset Monitor. When an asset is in the deactivated state when trying to use the asset via API, you will get an error stating that the asset is not activated.

Assets can be activated / deactivated anytime. When an asset is deactivated, already initiated transactions will not be suspended until it is completed.

You can view the detailed steps to activate an asset here.


Step 2: Download the API documentation

API documentation has the necessary information and structure of how an asset can be invoked. Every asset will have a different API definition. Details on the API endpoints and parameters are dynamically generated and will be  available in the API documentation.

You can download the API documentation by following the below steps:

  1. In the Asset Studio page, click against the asset which you would like to use and select the Download API option. You can download the API documentation for the published assets only.
  2. The Open API specification JSON file will be downloaded to your system.

Step 3: Execute an asset through API

API documentation

  • Generated API documentation (REST API)  is OpenAPI 3.0 specification compliant.
  • Each asset and its version will have a different API endpoint.
  • Each API, its definition and endpoints are versioned.

Authentication

  • Only valid user with proper access can use (Invoke) an asset via API.
  • API keys need to be passed as part of each and every API call. Only requests with valid API keys will be allowed to process.
  • We use JSON Web Token (JWT) for authorization of API requests.

End points

There are 3 API endpoints in the API documentation:

  • End Point 1: Get Authenticated
  • End Point 2: Invoke the asset
  • End Point 3: Get the status and result

End point 1: Get authenticated

  1. First endpoint is for Authentication.
  2. Once the request is successful, the response will be a valid JWT token.
  3. This access token comes with default expiry time which can be configured at the tenant level. 
  4. You need to Send this access token first to get the access from the Asset API to do the GET and POST operations.
  5. To Asset Token access you need to setup the following:
    • Request: GET
    • Service URL : {{baseUrl}}accesstoken/idx
  6. Go to Headers and update the following.
KeyValue
apikey{{apikey}}
usernameusername
passwordpassword
Content Typeapplication/json
  1. Enter the API key (replace this {{apikey}} with the actual value of the api key); for each and every tenant, a unique API key is provided.
  2. In username & password,  enter your login credentials.

End point 2: Invoke the asset

  1. Second endpoint is for executing (invoke) the asset.
  2. Once the request is successful, the response will have a trace_id. 
  3. To execute the Invoke Asset API,  go to Authorization tab
    1. In Type select Bearer Token
    2. In Token enter {{accesstoken}}
  4. Go to Headers and update the following:
    • Enter the API key; for each and every tenant, a unique API key is provided.
KeyValue
apikey{{apikey}} 
Content Typeapplication/json
  1. Go to Body tab
    1. There are different types of input for some cases, and for some cases, no input is required; it all depends on the asset the user creates.
      • Input_file – upload the file from your local storage.
      • S3_file_path – provide the file/folder path from the AWS S3 bucket.
      • No Input – in some cases no input required to execute the asset.
    2. After the successful execution the response is as follows.
      {    "trace_id": "<GENERATED_TRACE_ID>",
          "message": "Asset Invoked Successfully"
      }

End point 3: Get the status and results

  1. Third endpoint is for getting the status and output of the invoked asset.
  2. Once the request is successful, the final output. 
  3. To execute the Invoke Asset API, go to Authorization tab.
    1. In Type select Bearer Token,
    2. In Token enter {{accesstoken}}
  4. Go to Headers and update the following.
  5. Enter the API key (replace this {{apikey}} with the actual value of the api key); for each and every tenant, a unique API key is provided.
KeyValue
apikey{{apikey}} 
Content Typeapplication/json
  1. Go to the Params tab.
    1. Provide the value for path variable trace_id, the value of the trace_id is the response of the invoke asset api.
    2. After the successful execution of this API, the response is the result of the executed asset.

Invoking an asset API through curl

cuRL Request to generate the Access token

curl –location –request GET ‘https://api.intellectai.com/accesstoken/<YOUR_TENANT_ID>‘ \

       — header ‘apikey: <YOUR_API_KEY>‘ \

       — header ‘username: <YOUR_USER_NAME>‘ \       –header ‘password: <YOUR_PASSWORD>‘

cuRL Request to invoke the Asset with INPUT

curl --location --request POST 'https://api.intellectai.com/magicplatform/v1/invokeasset/<YOUR_ASSET_VERSION_ID>/extract' \

--header 'apikey: <YOUR_API_KEY>' \

--header 'Content-Type: multipart/form-data' \

--header 'Accept: application/json' \

--header 'Authorization: Bearer <YOUR_GENERATED_TOKEN>' \

--form 'input_file=@"<FILE_LOCATION>"'

cuRL Request to invoke the asset without INPUT

curl --location --request POST 'https://api.intellectseecstag.com/magicplatform/v1/invokeasset/<YOUR_ASSET_VERSION_ID>/usecase' \

--header 'apikey: <YOUR_API_KEY>' \

--header 'Content-Type: application/json' \

--header 'Accept: application/json' \

--header 'Authorization: Bearer <YOUR_GENERATED_TOKEN> ' \

--data-raw '{}'

cuRL Request to get the status of an asset

curl --location --request GET 'https://api.intellectai.com//magicplatform/v1/invokeasset/50d6e176-7837-44ef-8564-7847e5170f33/< trace_id >' \

--header 'apikey: < YOUR_API_KEY >' \

--header 'Accept: application/json' \--header 'Authorization: Bearer <YOUR_GENERATED_TOKEN>'

Code examples

Java

static HttpResponse<String> getData(String jsonStr, String endpoint, String accessToken)
throws Exception {
     HttpClient httpClient = HttpClient.newHttpClient();
     HttpRequest httpRequest = HttpRequest.newBuilder()
     .method("GET", body)
     .header("apikey", "<< apikey >>")
     .header("username", "<< username >>")
     .header("password", "<< password >>")
 .uri(URI.create("https://api.intellectai.com/accesstoken/<YOUR_TENANT_ID>”))
     .build();
HttpResponse<String> httpResponse = httpClient.send(httpRequest,                       HttpResponse.BodyHandlers.ofString());
}

Python

 import http.client
conn = http.client.HTTPSConnection("api.intellectai.com")
payload = ''
headers = {
'apikey': '<< apikey >>',
'username': '<<  username  >>',
'password': '<< password >>'
}
conn.request("GET", "//accesstoken/<YOUR_TENANT_ID>", payload, headers)
res = conn.getresponse()
data = res.read()
print(data.decode("utf-8"))

Node Js

var axios = require('axios');
var config = {
method: 'get',
url: 'https://api.intellectai.com//accesstoken/<YOUR_TENANT_ID>,
headers: { 
'apikey': '<< apikey >>', 
'username': '<<  username  >>', 
'password': '<< password >>'
}
};
axios(config)
.then(function (response) {
console.log(JSON.stringify(response.data));
})
.catch(function (error) {
console.log(error);
});

Possible errors and exceptions

  • The API returns exceptions in the HTTP response body when something goes wrong.
  • Possible Error Codes
    • OK – 200
    • CREATED – 201
    • ACCEPTED – 202
    • BAD_REQUEST – 400
    • UNAUTHORIZED – 401
    • FORBIDDEN – 403
    • NOT_FOUND – 404
    • NOT_ACCEPTABLE – 406
    • CONFLICT – 409
    • LENGTH_REQUIRED – 411
    • INTERNAL_SERVER_ERROR – 500
PropertyDescription
MessageA more descriptive message regarding the exception.
StatusCode(Conditional) An error code to find help for the exception.
ErrorAdditional Information about the exception

Example

  • Here is a simple 404
    {
    "statusCode": 404,
    "message": "
    Asset not found",
    "error": "Not Found"
    }
  • UnAuthorized Request 401
    {
      "statusCode": 401,
     "message": "Not Authorized.",
     "error": "Unauthorized"
    }

Activate an Asset


Activating an asset refers to the process of making a trained asset operational and available for use. By activating an asset, you enable it to process documents and perform its intended function.

Once an Asset is published, it can be activated in the Asset Monitor. This guide will walk you through the steps on how to activate your assets.


Users must have any one of the following policies to activate an asset:

  • Administrator Policy
  • Creator Policy
  • Manager Policy
  1. Head to the Asset Monitor page, clicknext to the asset you want to activate and select Settings. 


  2. The following window appears, click on More Settings and enable Active Asset and click on Submit.


  3. Your asset is successfully activated & you can check the Asset Status in the Status column in Asset Monitor.


Create an Extractor Asset


A Document AI model is a trained and published model that is consumable as an API and can be easily integrated with any third-party systems.

A Document AI “Extractor Asset” is a trained extraction model that contextually extracts fields and table information from unstructured and structured documents.

Users must have any one of the following policies to create an Extractor Asset: 

  • Administrator Policy
  • Creator Policy

This guide will walk you through the below steps on how to create your first Extractor Asset.

  1. Create a document set
  2. Create an asset
  3. Select documents
  4. Annotate and train
  5. Review results and validate
  6. Publish the asset

Step 1: Create a document set

The first step in creating an asset is to add documents to the Document library. Read Upload documents section to know how. If you already have an existing document set in the document library, you can skip this step and proceed to Create an asset.

Step 2: Create an asset

You can create assets using our Asset Studio.

  1. Head to the Asset Studio page, click the Create Asset then choose Classic AI. 


  1. In the Classic AI window that appears, enter a unique Asset name. 


  2. Optional: Enter a brief description and upload an image.
  3. In Document type, you can create a new Document type on the go or select from an existing Document type.
    • To create a new Document type, enter the name of the Document type that you wish to create and then press Enter key.
    • To select an existing Document type, search for the Document type and choose from the available results.

Nature of document

This option is only applicable when you create a new Document type.

  • In Nature of document option that appears, select the following required option(s) against the Document type.
    • Free flow – Use this option to extract the information from the unstructured and semi-structured documents. 
    • ID – Use this option to extract the information from the documents such as Driving License, Passport, and more.
    • Form – Use this option to extract the information from the documents such as Insurance Application form, Bank Account opening form, and more.

Note: You can select multiple options for the Nature of Document, as some documents may be a combination of Forms, ID cards , and Free flow formats.

  1. Click on Create and proceed to select documents.
  2. In Asset Visibility, choose any one of the following options.
    • All Users (default): Choose this option to share the asset with everyone in the platform who has the appropriate permissions to view and manage the asset.
    • Private: Choose this option to ensure that only you, the owner, can view and manage the asset. 

Step 3: Select documents

  1. In the Document Sets section, select or search for the document set for annotation.


  2. The files in the document set will be displayed in the right pane of the page.


  3. To annotate files, check the boxes next to the documents.

Note: Select a minimum of 10 documents per type for the asset to train. However, if you have more documents available, the recommended volume is 25 documents to provide a better accuracy measure.

  1. Click on Proceed and you will land on the annotation page.

Step 4: Annotate and train

Data annotation is the process of labeling data to show the outcome you want your machine learning model to predict.

Users must have any one of the following policies to annotate an Extractor Asset:

  • Administrator Policy
  • Creator Policy
  • Annotator Policy

If you choose to create the Document type on the go, follow the steps below to add fields, tables and sections.

Add field

  1.  In the Document type section, click Add new fields.


  2. In the Labels window that appears, click Add Field.


  3. Enter the field name and select the appropriate data type from the drop down list.


  4. You have the option to choose from various data types to annotate and add to your Extractor Asset. Each data type serves a specific purpose and can be tailored to meet your document processing needs.
    • Text : Choose this option if you wish to annotate only textual information against a field. 
    • Number: Choose this option if you wish to annotate numerical values against a field.
    • Datetime: Choose this option if you wish to annotate dates and times against a field.
    • Image: Choose this option if you wish to annotate images against a field. This allows for the extraction and handling of image data within documents.
    • Currency: Choose this option if you wish to annotate currency-related information against a field. 
    • Checkbox: Choose this option if you wish to annotate checkbox against a field. 
    • Checkbox(Group): Choose this option if you wish to annotate a group of checkboxes against a field.
  5. Click Settings against a field and choose any one of the following Expected Label Output options:
    • Required once: Choose this option if the field is expected only once in the output, regardless of whether it appears and annotated once or multiple times in the document. 
    • Required multiple: Choose this option if the field is expected to appear multiple times in the output, depending on whether it appears and annotated once or multiple times in the document. This option enables you to annotate multiple instances against a field and also generate multiple results against a field. 
  6. Select the PII check box if the field contains personally identifiable information to encrypt the field value. This option ensures data security of the field’s information. 
  7. To add more fields, select Add field.


  8. Use to delete the field.

Add table

  1. In the Labels window, click Add table.


  2. Enter the table name and click Add field. 
  3. Enter the field name and select the appropriate data type from the drop down list.


  4. Click Settings against the table and choose any one of the following Expected Label Output options:
  5. Select the PII check box if the table contains personally identifiable information in order to encrypt the table values. This option ensures data security of the table information. 
  6. To add more tables, select Add table.


  7. Use to delete the table.
  8. The fields and entities added, will be displayed on the right hand panel of the page. You are now ready to annotate your documents.


  9. If you have selected an existing Document type, the fields and table headers will be displayed on the right panel and you can begin annotating the fields and tables. 

Add section

Section and group is a feature that allows users to extract a group of fields and tables as they appear in the documents.
For more information on how to add a section, see Add Section and Group page.

Annotate fields

The platform allows you to annotate a field using the following options: 

  • Auto Annotation 
  • Manual Annotation
Auto Annotation

Auto annotation refers to the automatic process of labelling data. It automatically annotates documents, reducing the need for manual effort. Auto Annotation enables the automatic extraction of field information from documents, making the process more efficient and less time-consuming.

Note: Auto Annotation is available only for text fields.

  1. On the Annotation page, click Auto Annotate.


  2. In the Auto Annotate window that appears, choose any one of the following options:


  3. Choose Selected Documents if you wish to auto annotate the selected documents.
  4. Choose All Documents if you wish to auto annotate all the documents. 
  5. Click Start to initiate the auto annotation process. 
  6. After auto annotation is completed, quickly review the extracted data to ensure its accuracy, as auto annotation may occasionally make incorrect predictions. This step is crucial for verifying that the correct data has been captured.
Manual Annotation

Manual annotation refers to the manual process of labelling data, requiring users to manually annotate the data against specific fields.

  1. On the Annotation page, select the field to be annotated in the right pane, spot the target text in the document and click on the left top corner of the text and draw a bounding box. Ensure the text is completely enclosed within the box. 
  2. Once the box is drawn, the text within the box will appear in the right pane. 

Note: You can annotate text, number, date and time, image, currency in the same way.

  1. To add multiple instances of a value for a single field, click on . This allows you to include additional instances or occurrences of the target text pertaining to a given field.
  2. If the value is not extracted as intended, click on the delete symbol to remove the annotation and restart the annotation process for the same field.

Annotate table

The table annotation feature allows users to extract table information from documents. For more information about how to annotate tables, see Annotate a Table.

Annotate section

The Section and Group feature allows users to extract a group of repeating fields and tables from documents with ease.
For more information on how to annotate section and group, see Annotate Section and Group.

Train

  1. Once the annotation is done for all documents, click on Train.
  2. You can view the annotation summary which provides an overview of the below details:
    • Document status: This shows the number of documents annotated and not annotated.
    • Field annotation: This shows the number of annotations per field.
    • Tables: This shows the number of tables annotated.
  1. Click on Proceed training to initiate asset training.
  2. While the training is in progress, you may choose to go back to the asset studio and you will see a unique entry for your asset with status “Training in progress”. Once completed, the status will change to “Training completed” at which point, you can access the asset from the Asset Studio to review the results.

Note: During the training phase, the documents are split into an 80:20 ratio, with 80% of the documents used for training and the remaining 20% for testing. The asset effectively learns from the provided training documents to develop a predictive model for identifying and extracting field information. It leverages the knowledge gained from these training documents to accurately extract the required fields from the test documents.

To save and export the annotations for later use, click on the export. This feature enables you to store the annotated data and utilize it as a template for similar tasks or assets you may create in the future.

To import annotations, you can use the import to bring in previously saved annotated data and apply them to assets you may create in the future.

Step 5: Review results and validate

Review results

  1. Click on the Asset in the Asset studio listing page and you will be directed to the Accuracy Results page.


  2. You can view the accuracy percentage which is a metric used to evaluate the performance of the asset. 
  3. You can gain a comprehensive overview of the total documents used, categorized based on their purpose for training and testing.
  4. You can view the complete list of documents used for testing the asset.
  5. You can also review the predicted fields against the annotated fields and compare the results. The results are provided under 3 categories, namely:
    1. Predicted correctly, where the annotated and predicted fields match
    2. Predicted incorrectly, where the annotations and prediction do not match 
    3. Not predicted, where fields were not predicted by the asset
  6. For each prediction you will find a confidence score which determines the level of confidence of the model to make the right prediction from the training provided.
  7. If the accuracy of the asset is lower than your expectations use Fine-tune to improve its accuracy. Click on Fine-tune to proceed the fine-tuning the asset. This involves adding more document samples with ample variations to the existing training data to improve the asset’s performance. For more information about Fine-tune, see Fine-tune an Extractor Asset.

Validate

To test the performance of the extraction asset on a new set of documents, use Validate.

  1. Click on Validate placed next to Review Results.
  2. Select a new document which was preferably not used during the training process and click on Proceed to initiate validation.
  3. Once the validation is completed, you can see the accuracy against each field.

Step 6: Publish the asset

  1. If the desired accuracy has been achieved, click on Publish. The following page will appear.


  2. Enter the name and description for the asset.
  3. Optional: Upload a sample image for a visual representation.
  4. Click on Publish and the status of the asset changes to Published and can be accessed in the Asset Studio. 


Note: Once the asset is published, you can download the API and its documentation. The API can be invoked independently or used within a specific use case. If you wish to consume this asset via API, see Consume an Asset via API page.

It is recommended to use URL aliases, if you wish to consume multiple versions of an Asset. It allows you to consume its different versions via a single API. For more information, see URL aliases.

You can also consume this asset in the Asset Monitor module. For more information, see Consume an Asset via Create Transaction page.

Create a Classifier Asset


A Document AI model is a trained and published model that is consumable as an API and can be easily integrated with any third-party systems.

A Document AI “Classifier Asset” is a trained model for document classification that can contextually identify and categorize various types or classes of documents e.g. Invoice, claims form, driving license etc, regardless of their structure, layout, or format.

Users must have any one of the following policies to create a Classifier Asset:

  • Administrator Policy
  • Creator Policy

This guide will walk you through the below steps on how to create your first Classifier Asset.

  1. Create a document set
  2. Create an asset
  3. Select documents
  4. Annotate and train
  5. Review results and validate
  6. Publish the asset

Step 1: Create a document set

The first step in creating an asset is to add documents to the Document library. Read Upload documents section to know how. If you already have an existing document set in the document library, you can skip this step and proceed to Create an asset.


Step 2: Create an asset

You can create assets using our Asset Studio.

  1. Head to the Asset Studio page, click Create Asset, and then choose Classic  AI. 


  2. In the Classic AI window that appears, enter a unique Asset name.


  3. Optional: Enter a brief description and upload an image.
  4. In Document type,  you can create a new Document type on the go or select from an existing Document type.
    • To create a Document type, enter the name of the Document type that you wish to create and then press Enter key.
    • To select an existing Document type, search for the Document type and choose from the available results.

Note: You must create or select a minimum of two Document types for creating a Classifier asset. If you wish to classify a single Document type, then create another Doc type as ” others” which you may reuse for other classifiers also. 

Nature of document

This option is only applicable when you create a new Document type. 

  • In the Nature of document option that appears, select the following required option(s).
    • Free flow –  Use this option to extract the information from the unstructured and semi-structured documents. 
    • ID –  Use this option to extract the information from the documents such as Driving License, Passport, and more.
    • Form – Use this option to extract the information from the documents such as Insurance Application form, Bank Account opening form, and more.

Note: You can select multiple options for the Nature of Document, as some documents may be a combination of Forms, ID cards , and Free flow formats.

  1. In Asset Visibility, choose any one of the following options.
    • All Users (default): Choose this option to share the asset with everyone in the platform who has the appropriate permissions to view and manage the asset.
    • Private: Choose this option to ensure that only you, the owner, can view and manage the asset.
  2. Click Create and proceed to select documents.

Step 3: Select documents

  1. In the Document Sets section, select or search for the document set for annotation.


  2. The files in the document set will be displayed in the right pane of the page.


  3. To annotate files, check the boxes next to the documents.

Note: Select a minimum of 10 documents to proceed for training. However, we recommend having a volume of 25 documents or more to provide a higher accuracy measure.

  1. Click on Proceed and you will land on the annotation page.

Step 4: Annotate and train

Annotation refers to the process of labeling documents against the Document types defined as part of the creation step.

Users must have any one of the following policies to annotate a Classifier Asset: 

  • Administrator Policy
  • Creator Policy
  • Annotator Policy

Annotate

  1. You may choose/select one or more documents individually and tag to the respective Document type displayed on the right pane of the page.
  2. The selected documents are successfully tagged to the respective Document type.
  3. To choose multiple documents, utilize the Section option that groups similar documents.
     

Train

  1. Once all the documents are annotated, click on Train. While the training is in progress, you may choose to go back to the Asset Studio and you will see a unique entry for your asset with status Training in progress. Once completed, the status will change to Training completed at which point, you can access the asset from the Asset Studio to review the results.

Note: During training, the documents are split into an 80:20 ratio, with 80% of the documents used for training and the remaining 20% for testing. During the training phase, the asset effectively learns from the provided training documents to develop a predictive model for identifying Document types. It leverages the knowledge gained from these training documents to accurately predict the Document type of the test documents.


Step 5: Review results and validate

Review results

  1. Click on the Asset in the Asset studio listing page and you will be directed to the Accuracy Results page.


  2. You can view the accuracy percentage which is a metric used to evaluate the performance of the asset.  
  3. You can gain a comprehensive overview of the total documents used, categorized based on their purpose for training and testing.  
  4. You can view the complete list of documents used for testing the asset.
  5. You can also review the predicted Document type against the annotated file and compare the results. The results are provided under 2 categories, namely:
    1. Predicted correctly, where the annotated and predicted Document types match
    2. Predicted incorrectly, where the annotations and  prediction do not match.
  6. For each prediction you will find a confidence score which determines the level of confidence of the model to make the right prediction from the training provided.
  7. If the accuracy of the Asset is lower than expected, use Fine-tune to improve its accuracy. Click on Fine-tune, to proceed with fine-tuning the Asset. This involves adding more document samples with ample variations to the existing training data to improve the Asset’s performance. For more information about Fine-tune, see Fine-tune a Classifier Asset.

Validate

To test the performance of the classifier asset on a new set of documents, use Validate.

  1. Click on Validate placed next to Review Results.
  2. Select a new document which was preferably not used during the training process and click on Proceed to initiate validation.
  3. Once the validation is completed, you can see the accuracy against each document. 

Step 6: Publish the asset

  1. If the desired accuracy has been achieved, click on Publish.
  2. Enter the name and description for the asset.
  3. Upload a sample image for a visual representation.This is optional.
  4. Click on Publish and the status of the asset changes to Published and can be accessed in the Asset Studio. 


Note: Once the asset is published, you can download the API and its documentation. The API can be invoked independently or used within a specific use case. If you wish to consume this asset via API, see Consume an Asset via API page.

It is recommended to use URL aliases, if you wish to consume multiple versions of an Asset. It allows you to consume its different versions via a single API. For more information, see URL aliases.

You can also consume this asset in the Asset Monitor module. For more information, see Consume an Asset via Create Transaction page.

Upload Documents


The first step in creating an asset is to add documents to the Document library.

Users must have any one of the following policies to upload documents:

  • Administrator Policy
  • Creator Policy

This guide will walk you through the steps on how to set up your first document set.

  1. Know the accepted document formats & storage limitations
  2. Create a document set
  3. Upload files

Document set refers to the collection of documents that are used to train and test an asset.

Step 1: Know the accepted document formats & storage limitations


Before uploading the required documents, check the documents with the following accepted formats and storage limitations.

  • Supported file formats: PDF, PNG, JPEG, TIFF, DOCX.
  • Maximum document size: 20 MB.
  • Ensure that the file is not password protected and not zipped.
  • Make sure images and documents have a resolution of at least 200 DPI (300 DPI is recommended).
  • Upload documents without watermarks.

Step 2: Create a document set

  1. Head to the Document Library module and then click Create document set.


  2. In Create document set window that appears, enter a unique document set name and a brief description of the document set.


  1. Click Create to create a new document set.

Step 3: Upload files

You can upload documents using the following options: 

  • Manual Upload: It allows you to upload the documents from your local system. 
  • Connector Upload: It  allows you to configure the s3 connector and access the documents from the AWS and stored in the Doc Lib.
  • Web Crawler Upload: It allows you to fetch the web pages and documents from the websites and stored in the Doc Lib

Manual Upload

  1. On the Document Library page, select the Document set you wish to import the documents.
  2. In the Document set page that appears, click  Import  and then select Files option to Import the required documents from your local system.


Connector Upload

  1. On the  Document Library page, select the Document set you wish to Import the documents.
  2. In the Document set page that appears, click  Import  and then select  Amazon S3 option.


  3. In the Amazon S3 connector window that appears, enter the required details.


    • Optional: Use Test connection to test the connection. 
    • Click Start import to import the document via Amazon S3 connector. 
  4. In Choose your connection, select the connection that you wish to connect. 
  5. In Bucket Name, enter the bucket name. 
  6. In Folder or file path, enter  folder or file path. 
  7. Click Add metadata to categorize and retrieve relevant information for the documents.


Web crawler Upload

  1. On the  Document Library page, select the Document set you wish to import the documents into.
  2. In the Document set page that appears, click  Import and then select  Web Crawler option.
  3. In the Web Crawler window that appears, use the Custom option.


  • In the URL, enter the URL that you wish to crawl.
  • Optional: Add an additional URL if you wish to fetch the additional web pages from different domains. For example, If you entered “abcd.com”  as the first url you can add other domains (abcd.in, Acbd.org) in additional URLs.

Note: It is recommended to provide the valid URLs and relative domains.

  • In Scrap level, enter the level that you wish to fetch information from the web page. The scrap level refers to the depth or level of pages that the web crawler will scrape or visit during its crawling process. It determines how deep into a website’s structure the crawler will go to gather information.

    For example: If you’re using a web crawler to gather information from a news website you set the scrap level to 2, the crawler will visit the homepage (level 0), then follow links to articles (level 1), and possibly follow links within those articles to other pages (level 2). It won’t go deeper than the specified level.

  • In Maximum URLs, enter the total number hyperlinks the web crawler will fetch  information from.  The maximum URL refers to the limit on the number of URLs or links that the web crawler will process during its crawling operation. This limit helps control the crawler’s workload and prevents it from endlessly crawling through an excessively large number of URLs. For example: If you’re using a web crawler to collect data from a bank’s website and you set the maximum URLs to 100, the crawler will stop after it has visited 100 different pages on the bank’s website, ensuring it doesn’t spend too much time crawling endless links.
  1. Click Start import  to import the web pages into the Document library. 
  • « Go to Previous Page
  • Go to page 1
  • Interim pages omitted …
  • Go to page 6
  • Go to page 7
  • Go to page 8
  • Go to page 9
  • Go to Next Page »

© ­Intellect Design Arena Ltd,