#
How to Guide
#
Agent with Pre‑trained Knowledge
A Default Agent uses the pre‑trained knowledge of its
foundational LLM to answer a broad range of questions.
It operates without connecting to additional enterprise data
sources, making it quick to configure and deploy.
Suitable for:
Generating marketing ideas for a new investment product.
Offering best‑practice tips for improving customer onboarding in retail banking.
Summarising publicly available financial news into concise daily or weekly bulletins for internal awareness.
Creating generic financial literacy content such as tips for budgeting, saving, or understanding credit scores.
Step 1: Navigate to Expert Agent Studio and Start Building
*Action:* From your Purple Fabric workspace:
Open Expert Agent Studio.
Click + Build to create a new agent.

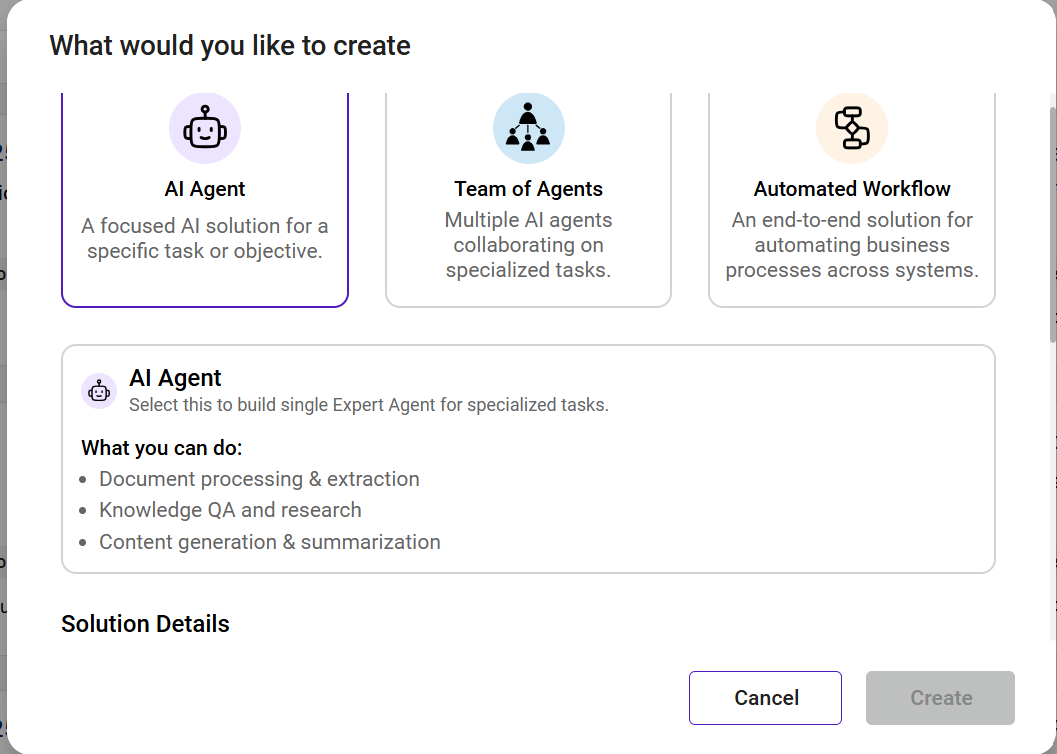
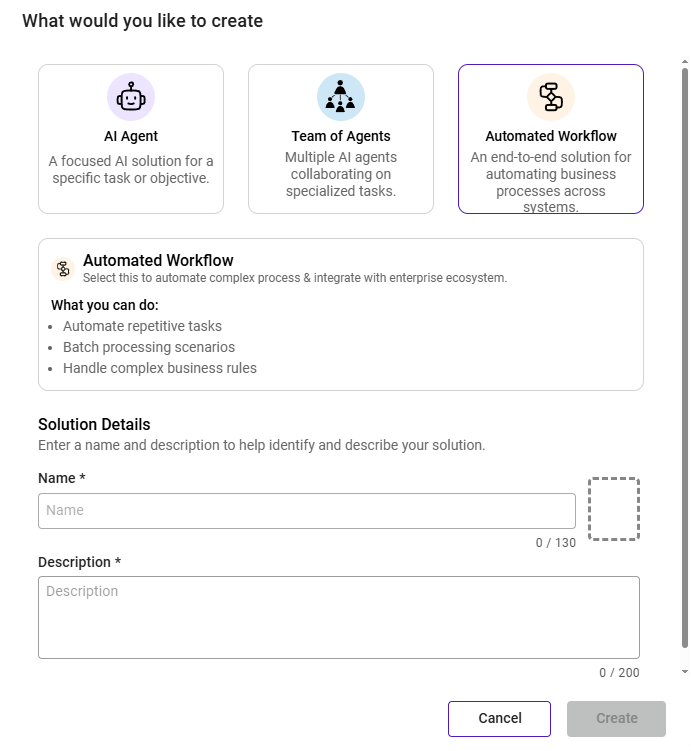
You will see the "What would you like to create?" screen with three options:
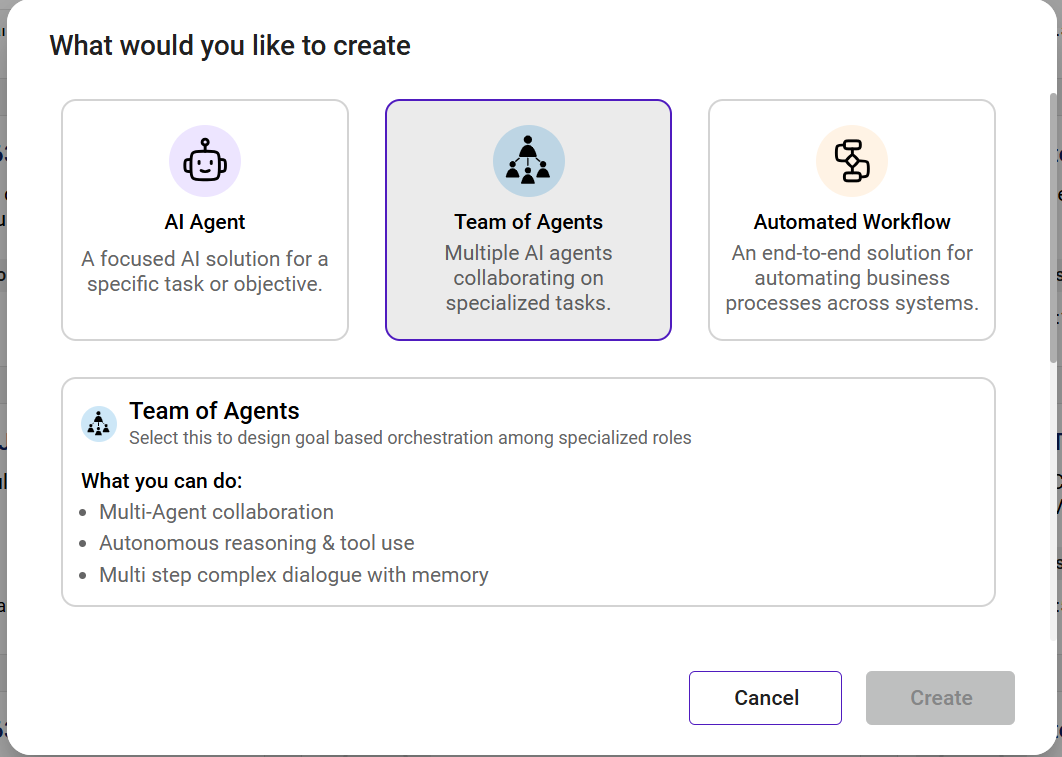
AI Agent -- A single expert for a specific task (Select this).
Team of Agents -- Multiple experts collaborating.
Automated Workflow -- Full‑process automation.
Step 2: Setup your Agent (Solution Details, Interaction Type, and Visibility)
Once you select AI Agent, configure:
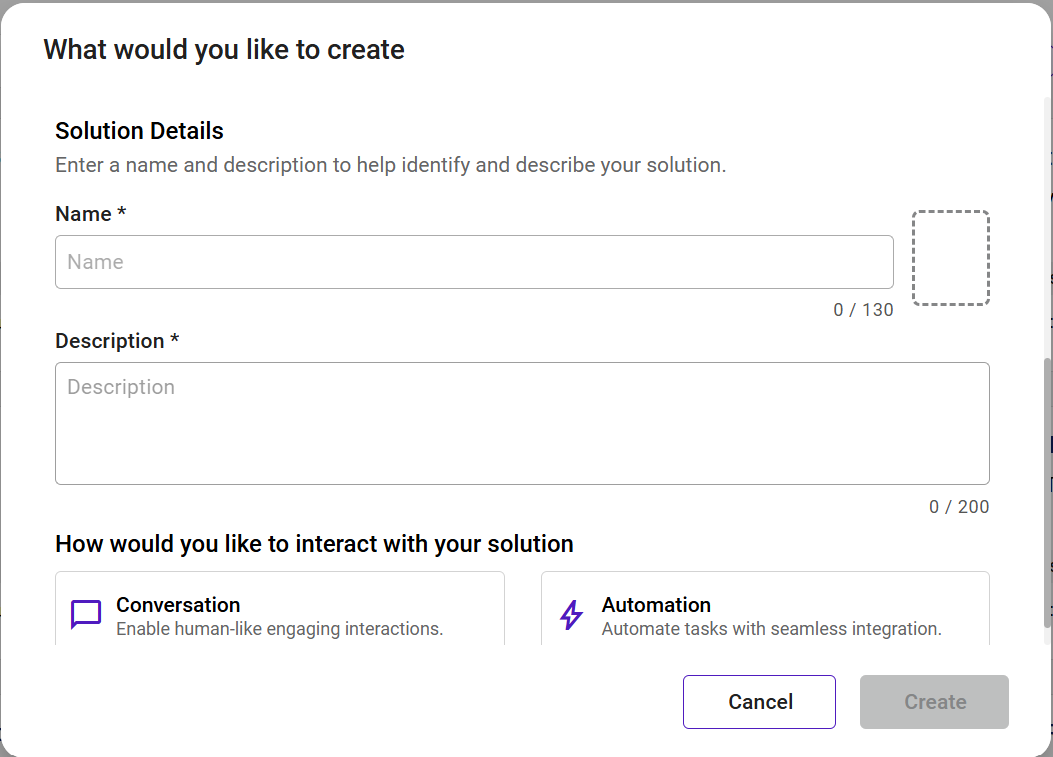
Solution Details
Name* -- A descriptive name (max 130 characters).
Description* -- Briefly explain purpose (max 200 characters).
(Optional) Image -- Upload an icon for easy identification.
Interaction Type
Conversation -- For real‑time, human‑like interactions.
Automation -- Automate tasks with seamless integration.
Visibility
Private -- Only you can access (ideal for testing).
Public -- Shared with all members within your workspace.
Note: You are now in the Agent Designer interface. The left panel is used to configure and build your agent, while the right panel allows you to test and validate its functionality in real time.

Step 3: Select the Default Template
*Action:* In the Prompt Template field, choose Default.
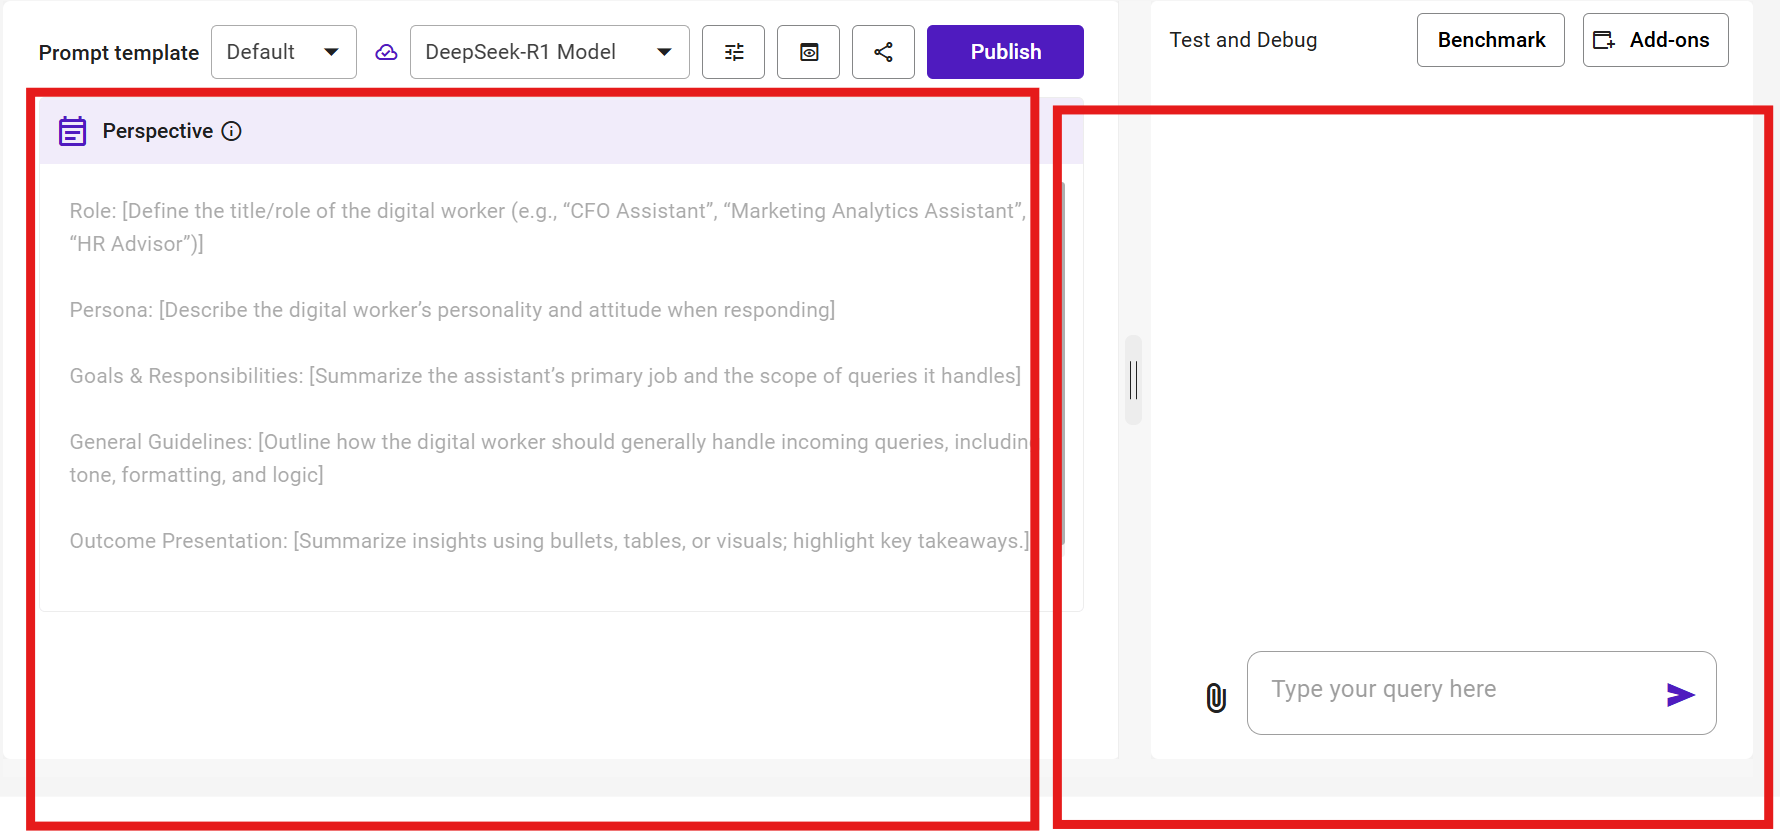
Step 4: Define Perspective (System Instructions)
In Purple Fabric, the Perspective defines the role, tone, and behaviour of your Agent.
Action:
Role: Define the role (e.g., "Retail Banking Advisor").
Persona: Tone and style (e.g., "Clear, friendly, jargon‑free").
Goals & Responsibilities: Key objectives.
General Guidelines: Formatting and content rules.
Outcome Presentation: Preferred format for responses.
Note: For automation agents, use placeholders (e.g., ) in the perspective to dynamically insert user‑provided values during execution.
Why it matters:
- Refer to [Prompt Engineering]
If Automation is Selected -- Define Input and Output Schemas
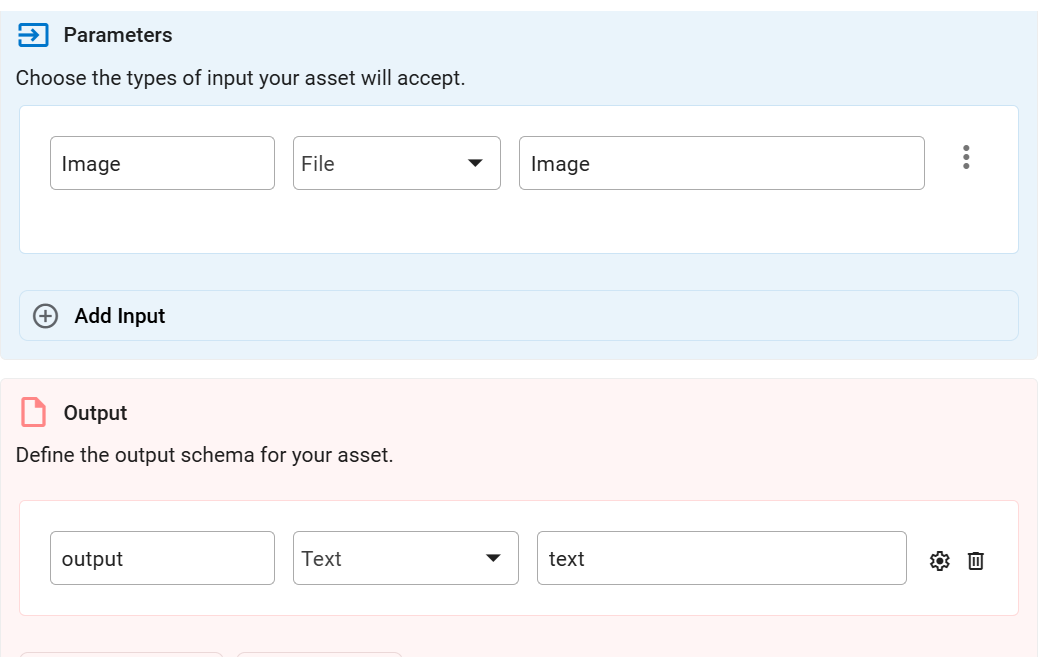
When Automation mode is chosen in Step 2, you must define how your agent will receive and return data.
Input Schema -- Define the input variables your agent will accept and how they will be used.
Name -- Parameter name (e.g., CustomerID, DocumentFile).
Type -- Choose File (supports only one file, e.g., PDF, image) or Text (up to 9 text parameters if one file is used, or up to 10 text parameters if no file is included).
Description -- Short explanation of the parameter and its purpose.
Example:
For an Automated Compliance Status Checker agent:
Name: CustomerFile
Type: File
Description: "Onboarding document set containing KYC forms and proof of identity."
AND
Name: CustomerID
Type: Text
Description: "Unique identifier for the customer in the CRM system."
Output Schema -- Define the output schema:
If Add Line Item is selected
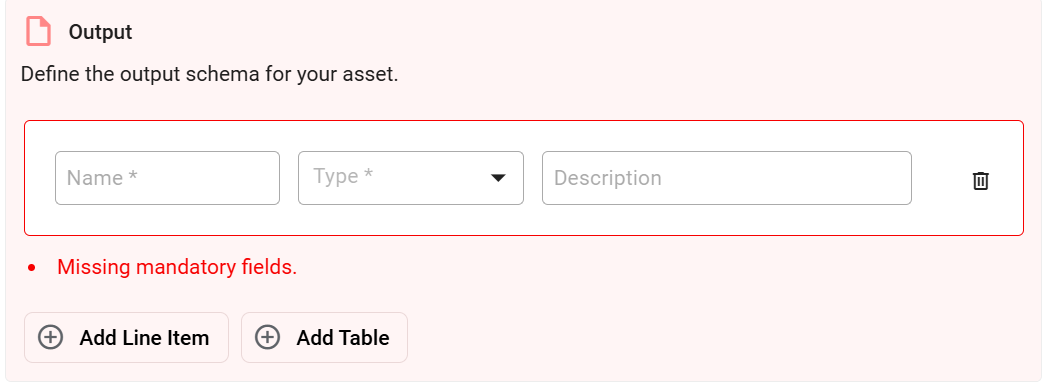
Name -- Output field name (e.g., ComplianceStatus, SummaryReport).
Type -- Choose Text (written output), Number (numeric value), or Boolean (True/False).
Description -- Short explanation of the output field.
If Add Table is selected
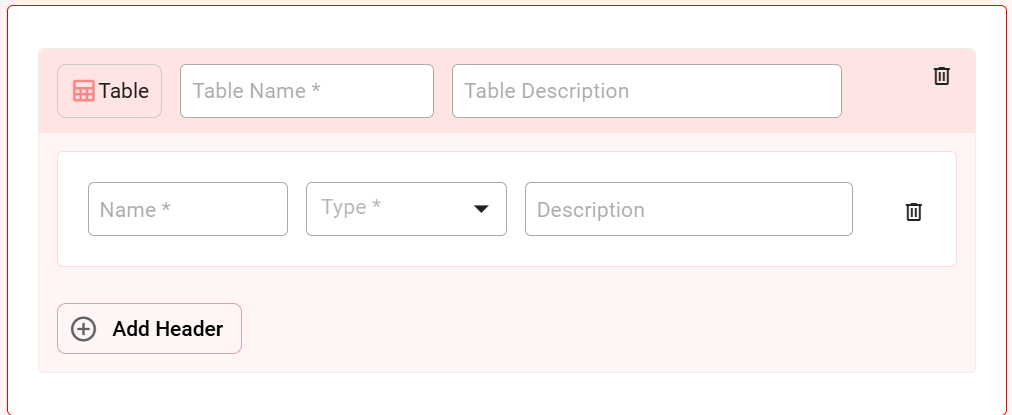
Table Name -- Output field name (e.g., ComplianceStatus, SummaryReport).
Table Description -- Short explanation of the output field.
If Add Header is selected
Name -- Output Table field name (e.g., ComplianceStatus, SummaryReport).
Type -- Choose Text (written output), Number (numeric value) based on the output.
Description -- Short explanation of the output field.
*Example:* Automated compliance status checker:
*Input Schema:*
- Name: CustomerFile, Type: File, Description: "Onboarding documentset."
*Output Schema:*
- Name: ComplianceStatus, Type: Boolean, Description: "True if allcompliance checks passed."
Step 5: Configure Model Settings
Click the Configuration button to fine‑tune your agent:
Temperature: Controls creativity vs. predictability.
Top‑P: Adjusts diversity in responses.
Lookback Limit: Sets how much conversation history is remembered.
Step 6: Test Your Agent
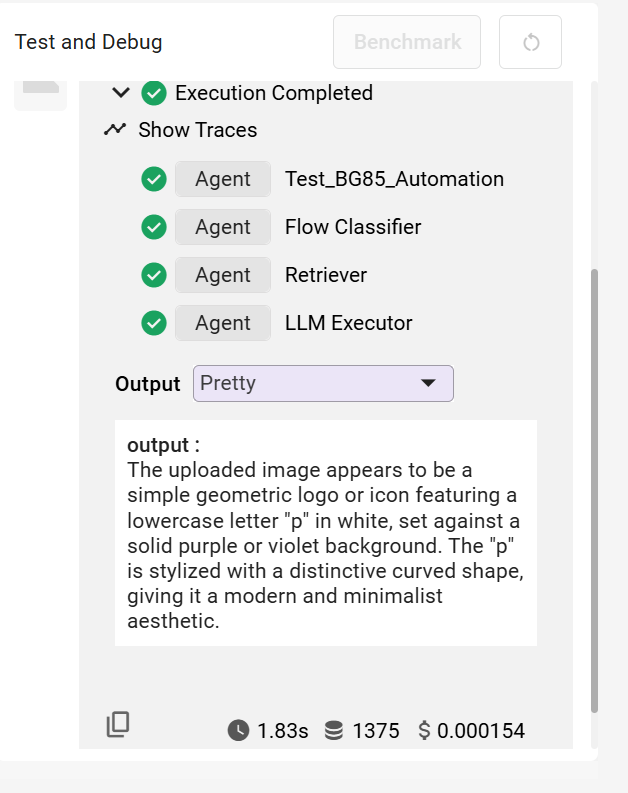
If Automation is Selected:
Test & Debug in Automation Mode:
Pretty -- Shows formatted, human‑readable output.
Raw LLM Response -- Displays the exact unformatted model output.
Action:
Ask different types of queries to see how the agent performs.
Save your configuration.
Purpose:
Validate responses match expectations.
Spot inconsistencies early.
Refine configuration before publishing.
#
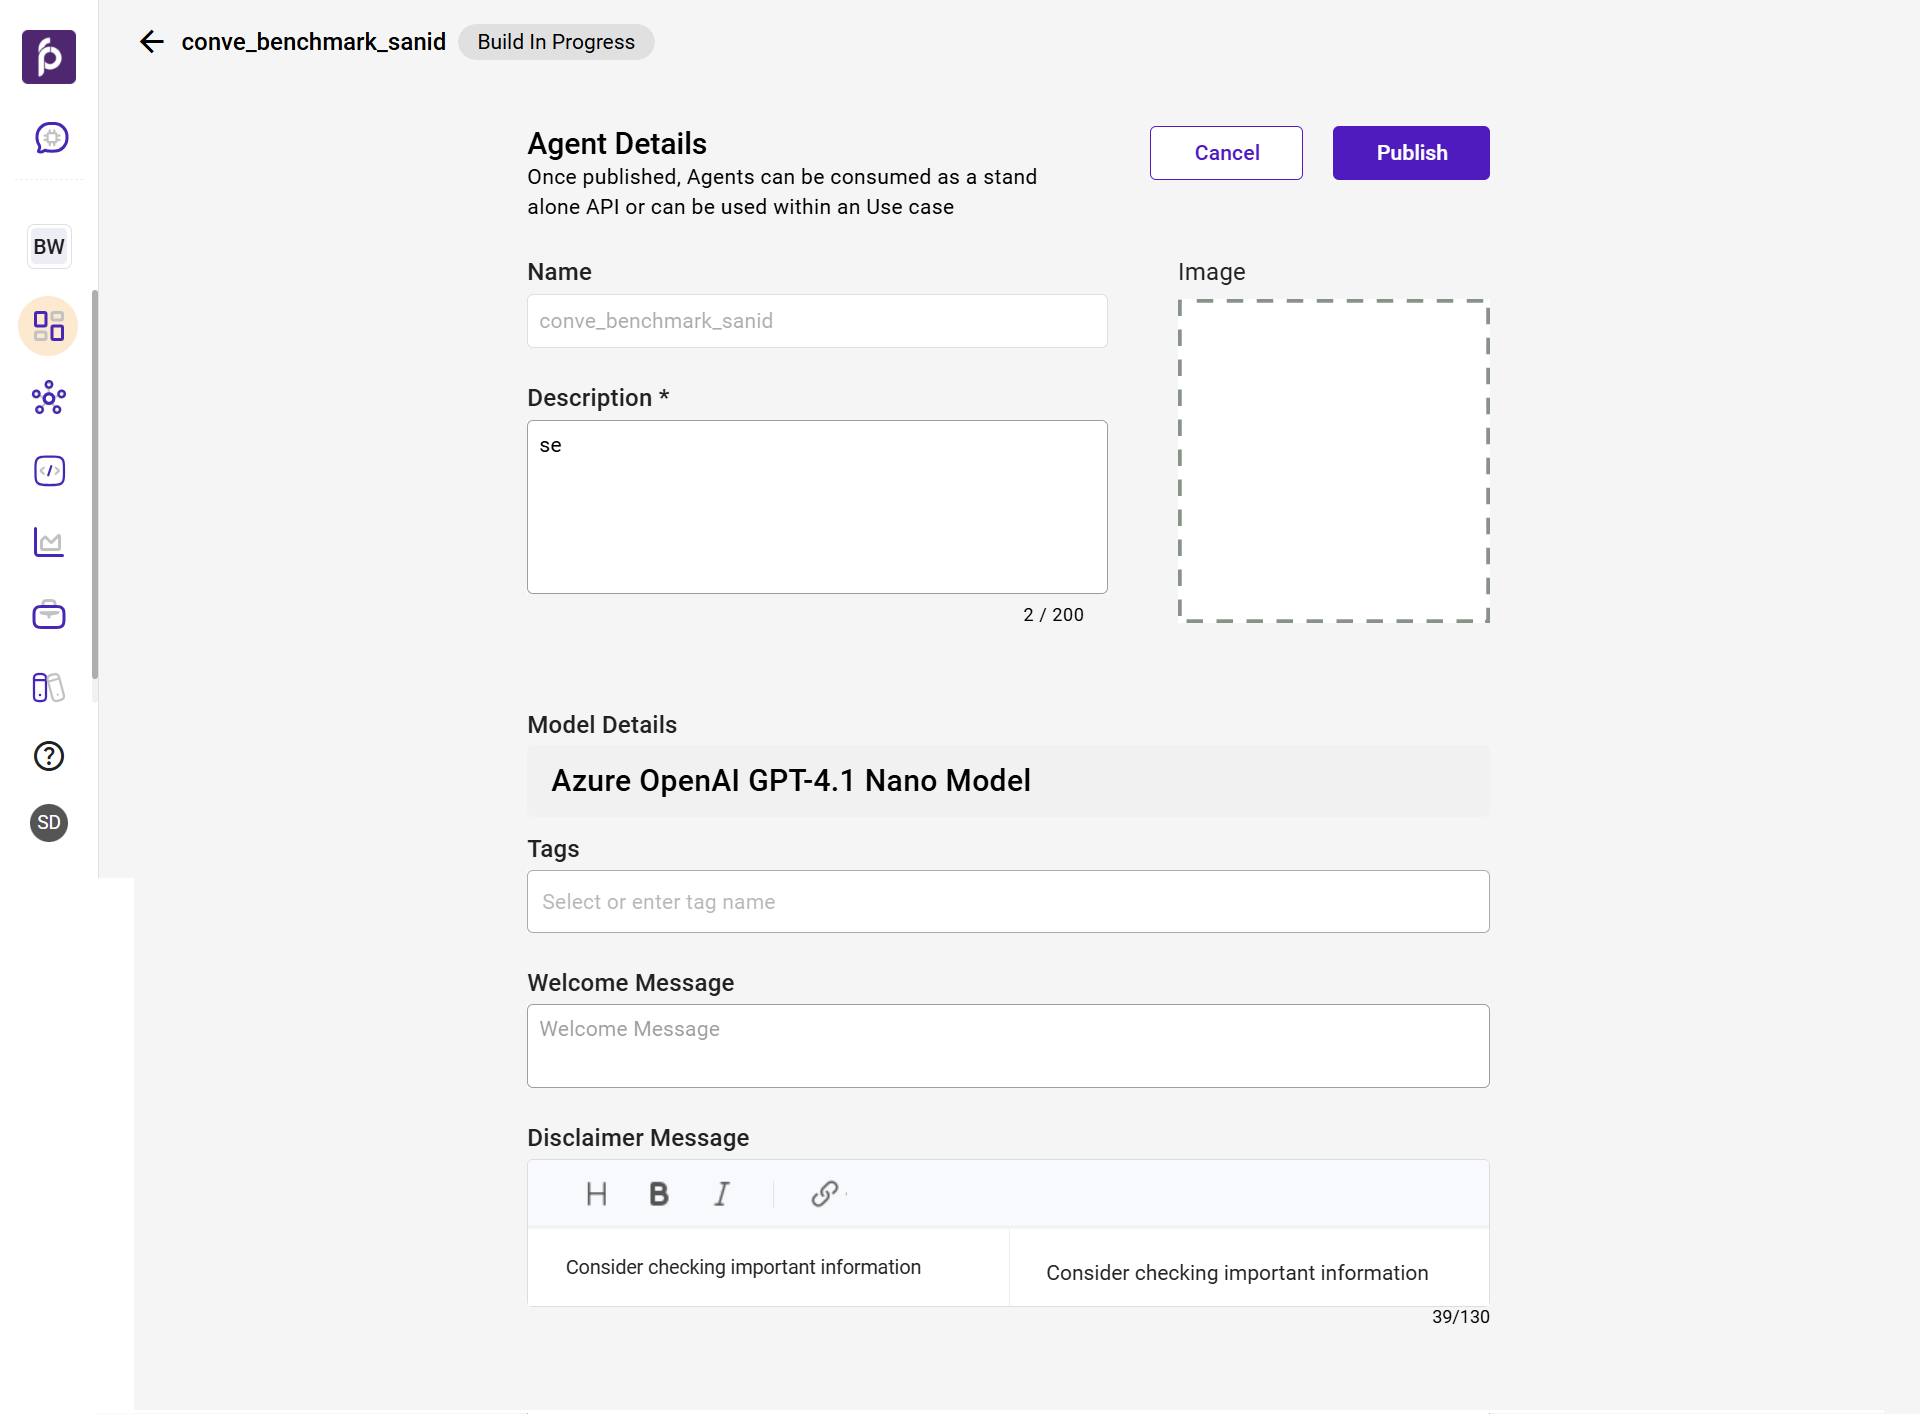
Step 7: Review and Publish
On the Publish page:

Agent Details:
Confirm Name and Description.
Upload an Image if desired.
Add Tags for easy search.
Model Details:
- Confirm the correct LLM is selected.
Advanced Settings:
Welcome Message: Initial greeting.
Disclaimer Message -- Add a short compliance or legal note (up to 130 characters). You can also include links to detailed policies or resources if needed.
Step 8: Final Action
Review all settings and details.
Click Publish to deploy.
#
Build your first Knowledge-backed Agent
A Knowledge‑Backed Agent uses Retrieval Augmented Generation to combine the reasoning capabilities of its foundational LLM with trusted, verified knowledge from the Enterprise Knowledge Garden.
This allows it to deliver precise, context‑aware, and decision‑grade responses grounded in organization's proprietary data.
Suitable for:
Summarising monthly financial performance reports into executive‑friendly highlights.
Providing a quick overview of common mortgage products for training staff.
Step 1: Pre‑requisite -- Prepare and Populate Your EKG
Before you start building:
Data Ingestion --- Ensure all relevant documents and knowledge sources are uploaded.
Chunking --- Segment documents into meaningful text chunks for retrieval.
Embedding --- Generate high‑quality embeddings for each chunk.
Indexing --- Confirm the EKG index is up‑to‑date for search efficiency.
Step 2: Navigate to Expert Agent Studio and Start Building
Action:
Open Expert Agent Studio in Purple Fabric.
Click + Build to start creating your new agent.
You will see:
What would you like to create?
AI Agent -- A single expert for a specific task (Select this).
Team of Agents -- Multiple experts collaborating.
Automated Workflow -- Full‑process automation.
Step 3: Setup your Agent -- Solution Details, Interaction Type, and Visibility
Solution Details
Name* -- A descriptive name (max 130 characters).
Description* -- Briefly explain purpose (max 200 characters).
(Optional) Image -- Upload an icon for easy identification.
Interaction Type
Conversation -- For real‑time, human‑like interactions.
Automation -- Automate tasks with seamless integration.
Visibility
Private -- Only you can access (ideal for testing).
Public -- Shared with all members within your workspace.
Step 4: Select the RAG Template

Action:
- In the Prompt Template dropdown, select RAG.
Step 5: Add Perspective (System Prompt)
In Purple Fabric, the Perspective defines the role, tone, and behaviour of your Agent.
Action:
Role: Define the role (e.g., "Retail Banking Advisor").
Persona: Tone and style (e.g., "Clear, friendly, jargon‑free").
Goals & Responsibilities: Key objectives.
General Guidelines: Formatting and content rules.
Outcome Presentation: Preferred format for responses.
Note: For conversational agents, use placeholders (e.g., ) in the perspective to dynamically insert user‑provided values during execution.
Why it matters:
Refer to [Prompt Engineering]
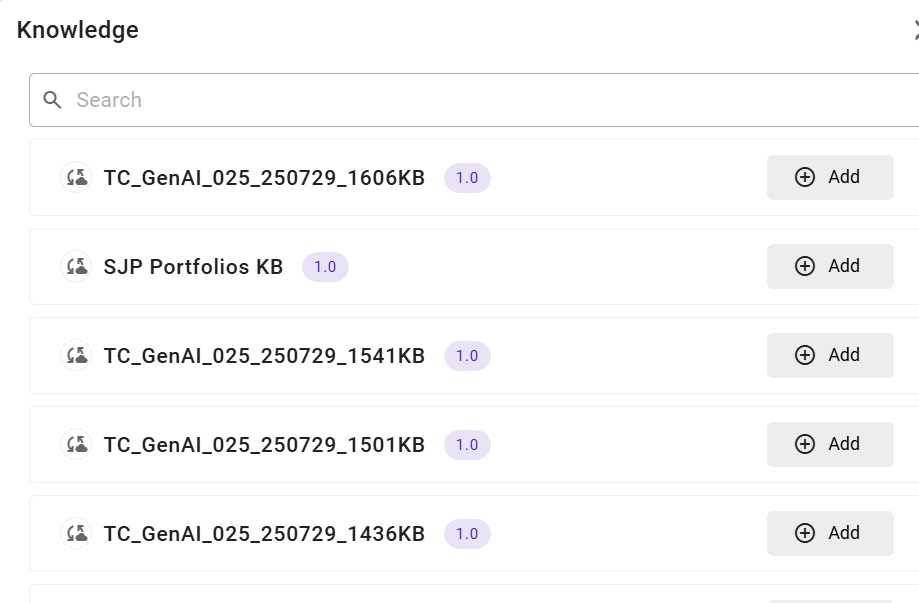
Step 6: Link to Knowledge Garden(s)
Action:
- In the Knowledge settings, select one or more EKGs for the Agent
to use.
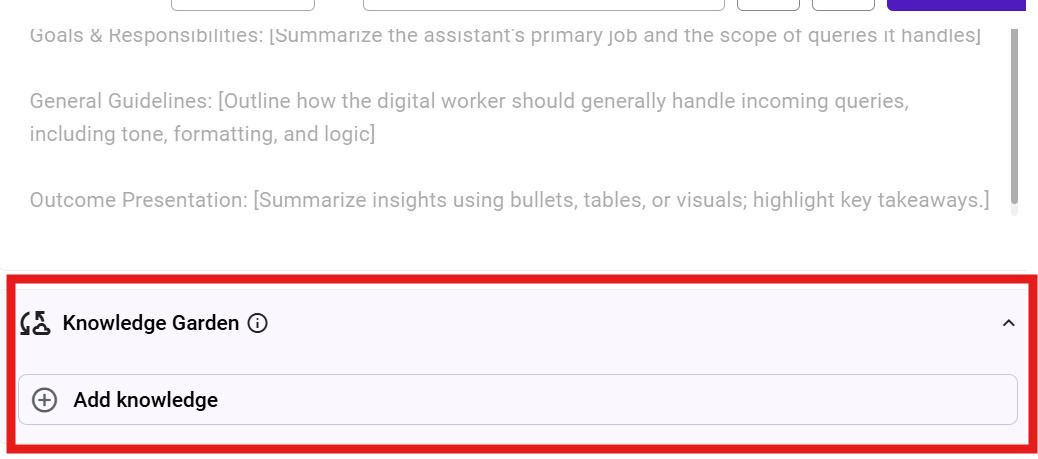
*Purpose:* The linked EKGs become the single source of truth for your Digital Expert.
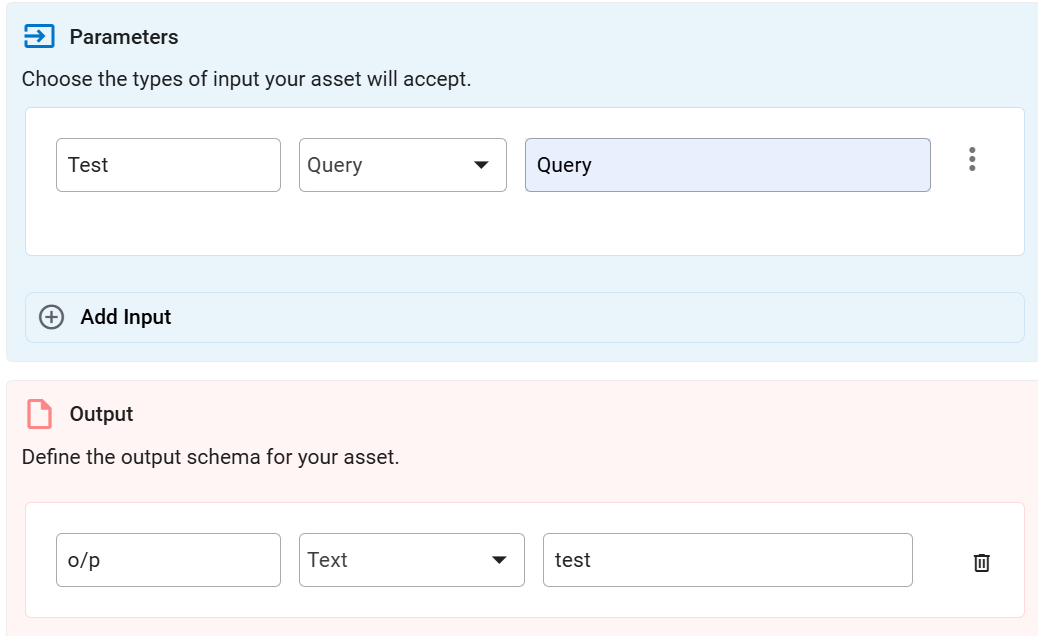
If Automation is Selected -- Define Input and Output Schemas
When Automation mode is chosen in Step 3, you must define how your RAG Digital Expert will receive and return data.
Input Schema -- Define the input variables your agent will accept and how they will be used.
Name -- Parameter name (e.g., CustomerID, DocumentFile).
Type -- Choose Query (The main user question or request for retrieval) or RAG Filter (Optional filter criteria to refine retrieval results. e.g., date range, document category).
Description -- Short explanation of the parameter and its purpose.
Output Schema -- Text:
- The retrieved and processed answer is based on EKG content.
Example:
For an Automated Compliance Status Checker agent:
Name: CustomerQuery
Type: Query
Description: "Onboarding document set containing KYC forms and proof of identity."
AND
Name: CustomerID
Type: RAG Filter
Description: "Unique identifier for the customer in the CRM system."
Step 7: Configure Advanced Retrieval Parameters
Action: Go to Advanced Retrieval Configurations and fine‑tune for better accuracy and efficiency:
Retrieval Strategy --- Semantic, keyword, or hybrid search.
Chunk Size & Overlap --- Controls how large each retrieved text segment is.
Re‑ranking --- Prioritize the most relevant chunks.
Similarity Score Threshold --- Filter for high‑confidence matches.
Step 8: Add‑ons and Advanced Configuration (Optional)
Add‑ons: Guardrails, Conversation Starters, Follow‑up Questions, Traces.
Advanced Retrieval Configurations: For retrieval‑linked tools.
Lookback Limit: How much past context to keep.
Step 9: Provide Experience Examples (Optional but Recommended)
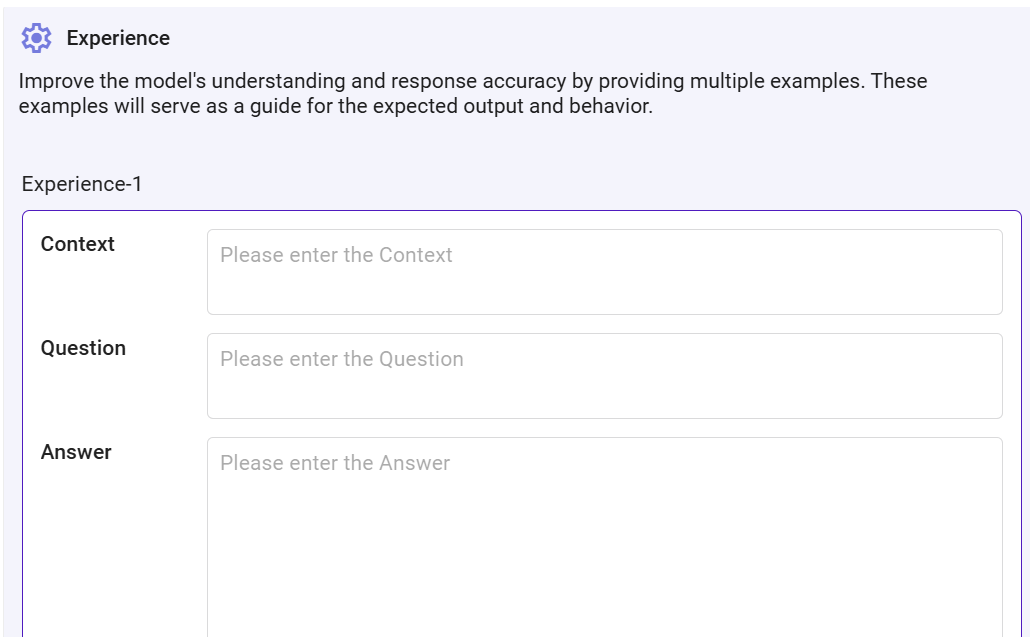
*Action:* In the Experience section, add:
Context --- Scenario background *(e.g., portfolio manager reviewing quarterly performance)*
Question --- Sample user prompt *(e.g., "Summarise Q2 2025 portfolio performance")*
Answer --- Ideal model output (e.g., "Portfolio achieved 7.4% growth, driven by tech and healthcare sectors")
*Purpose:* Improves accuracy and ensures responses follow your desired structure.
Step 10: Test the Agent
*Action:* Use the built‑in testing interface with:
Factual Queries --- Direct look‑ups from EKG.
Complex Queries --- Combining multiple document references.
Edge Cases --- Ambiguous questions.
Negative Tests --- Queries without matching info.
Test & Debug in Automation Mode:
Pretty -- Displays the formatted, readable output.
Raw LLM Response -- Shows the exact unformatted model output.
Step 11: Review and Publish
Agent Details
Confirm Name, Description, and Image.
Add Tags for search.
Model Details
- Verify correct LLM is selected.
Advanced Settings
Welcome Message --- Opening greeting.
Disclaimer Message --- Add a short compliance or legal note (up to 130 characters). You can also include links to detailed policies or resources if needed.
Step 12: Final Action
Review all configurations.
Click Publish to deploy.
#
Build your first Multi-Agent Solution with Team of Agents
Characteristics of Team of Agents:
Coordinate multiple agents to achieve a shared business goal.
Combine reasoning steps with tool usage for fact‑based decisions.
Handle multi‑step, complex queries while maintaining context.
Enable autonomous collaboration between agents for orchestration workflows.
Step 1: Pre‑requisite -- Prepare Your Tools and Agents
Before you start building:
At least one Tool must be ready:
A custom Python function.
An API connector (e.g., credit bureau API, CRM API).
A pre‑configured Purple Fabric connector (e.g., SQL, ServiceNow).
Optional: Have individual AI Agents pre‑built if they will be part of your orchestration.
Step 2: Navigate to the Agent Creation Interface
*Action:* In Purple Fabric, go to Expert Agent Studio → click + Build.
You will see:
What would you like to create?
What would you like to create?
AI Agent -- A single expert for a specific task.
Team of Agents -- Multiple experts collaborating (Select this).
Automated Workflow -- Full‑process automation.
Step 3: Setup your Team of Agents -- Solution Details, Interaction, Visibility & Perspective
After selecting Team of Agents, complete the following:
Solution Details
Name* -- A descriptive name (max 130 characters).
Description* -- Briefly explain purpose (max 200 characters).
(Optional) Image -- Upload an icon for easy identification.
Interaction Type
Conversation -- For real‑time, human‑like interactions.
Automation -- Automate tasks with seamless integration.
Visibility
Private -- Only you can access (ideal for testing).
Public -- Shared with all members within your workspace.
Perspective (Role Definition)
In Purple Fabric, the Perspective defines the role, tone, and behaviour of your Agent.
Action:
Role: Define the role (e.g., "Retail Banking Advisor").
Persona: Tone and style (e.g., "Clear, friendly, jargon‑free").
Goals & Responsibilities: Key objectives.
General Guidelines: Formatting and content rules.
Outcome Presentation: Preferred format for responses.
Note: For conversational agents, use placeholders (e.g., ) in the perspective to dynamically insert user‑provided values during execution.
Why it matters:
Refer to [Prompt Engineering]
If Automation is Selected -- Define Input and Output Schemas
When Automation mode is chosen in Step 3, you must define how your ReAct Agent will receive and return data.
Input Schema -- Define the input variables your agent will accept and how they will be used.
Name -- Parameter name (e.g., CustomerID, DocumentFile).
Type -- Choose Query (The main user question or request for retrieval) or File (Optional filter criteria to refine retrieval results. e.g., date range, document category).
Description -- Short explanation of the parameter and its purpose.
Output Schema -- Text:
- The retrieved and processed answer is based on EKG content.
Example:
For an Automated Compliance Status Checker agent:
Name: CustomerQuery
Type: Query
Description: "Onboarding document set containing KYC forms and proof of identity."
AND
Name: CustomerFile
Type: File
Description: "Unique identifier for the customer in the CRM system."
Step 4: Configure Tools and Agents
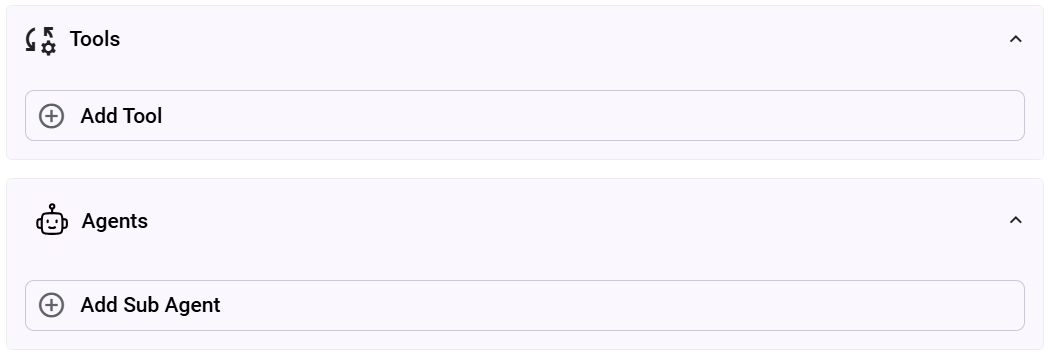
Attach the tools and link any agents that will participate:
Tools -- APIs, Python scripts, data connectors.
Agents -- Pre‑built agents for specialized subtasks.
*Example:* For Fraud Investigation Orchestration:
Tools: Transaction Query API, Customer Profile Lookup.
Agents: Fraud Pattern Detection Agent, Customer Verification Agent.
Step 5: Define ReAct Instructions in Experience
The ReAct Agent chain of thought follows:
Question -- User's input *(e.g., "Verify KYC compliance for customer ID 4589")*
Thought -- Reasoning to break down the problem *(e.g., identify required verification steps)*
Action -- Select the tool *(e.g., "KYC Verification API")*
Action Input -- Pass correct parameters *(e.g., verify_kyc )*
Observation -- Capture output *(e.g., "All documents valid and verified")*
Thought -- Refine reasoning *(e.g., determine compliance status)*
Final Answer -- Deliver result (e.g., "Customer is KYC compliant")
Step 7: Test and Debug
Use the Test & Debug interface:
Run trial queries.
Review reasoning steps.
Confirm correct tool usage.
Adjust Perspective, Instructions, or Tools.
Step 8: Add‑ons and Advanced Configuration (Optional)
Add‑ons: Guardrails, Conversation Starters, Follow‑up Questions, Traces.
Advanced Retrieval Configurations: For retrieval‑linked tools.
Lookback Limit: How much past context to keep.
Step 9: Review and Publish
Agent Details
Confirm Name, Description, and Image.
Add Tags for search.
Model Details
- Verify correct LLM is selected.
Advanced Settings
Welcome Message --- Opening greeting.
Disclaimer Message --- Add a short compliance or legal note (up to 130 characters). You can also include links to detailed policies or resources if needed.
Step 10: Final Action
Review all configurations.
Click Publish to deploy.
#
Build your first Automated Workflow
Begin by creating an Automated Workflow asset. This serves as the foundational container that holds your workflow's logic, components, and configuration settings.
Follow these steps to create a new workflow within the system:
Navigate to the Expert Agent Studio module
Click the + Build button situated in the top right corner. A new "What would you like to create" window will appear.
Select the Automated Workflow option. In the "Solution Details" section of this window:
Enter a unique Name for your workflow in the "Name*" field (max 130 characters)
- The name must begin with a letter and can include letters,numbers, spaces, dashes, and underscores.
Provide a clear and concise Description* for your workflow in the designated field. (max 200 characters)
Set the visibility for your workflow by selecting either Private (visible only to you) or Public (visible to everyone in your workspace).
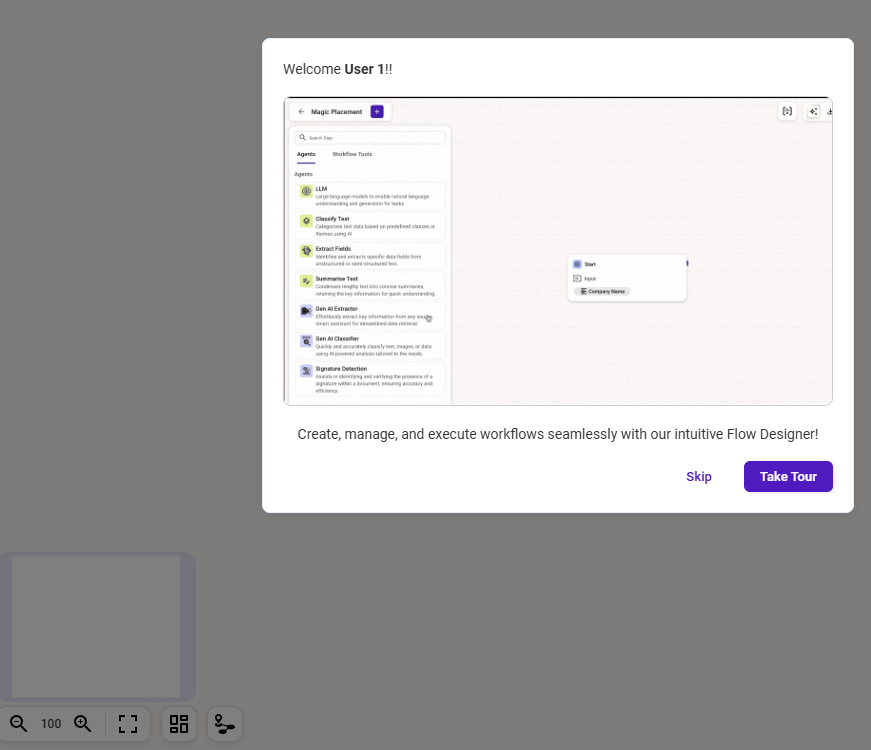
Click the Create button to finalize the creation of your new workflow. You will be taken directly to the Automated Workflow canvas.
Note for first-time users: Upon entering the canvas for the first time, a "Welcome" dialog will appear, offering a Guided Tour of the interface. You can click Take Tour to begin the walkthrough or Skip to explore independently. This tour can be restarted at any time by clicking the Flow Designer Tour Icon in the canvas controls.