#
Create your First Knowledge Garden
#
Create your First Knowledge Garden
#
Step 1: Create Knowledge Garden from EKG Module
Before creating a new Knowledge Garden, it is recommended to upload any necessary files to the Data Library. This streamlines the creation process and allows you to reuse the same files across multiple Knowledge Gardens without the need for repeated uploads. For detailed instructions on document uploads, please refer to the Data Library documentation.
Note: This step can be skipped if all required files have already been uploaded to the Data Library or you are uploading from local/external sources.
Follow these steps to create a new Knowledge Garden:
Navigate to the Knowledge Garden tab located on the left-hand side of the interface.
Click the Create New button situated in the top right corner. A new “Create Knowledge” window will appear.
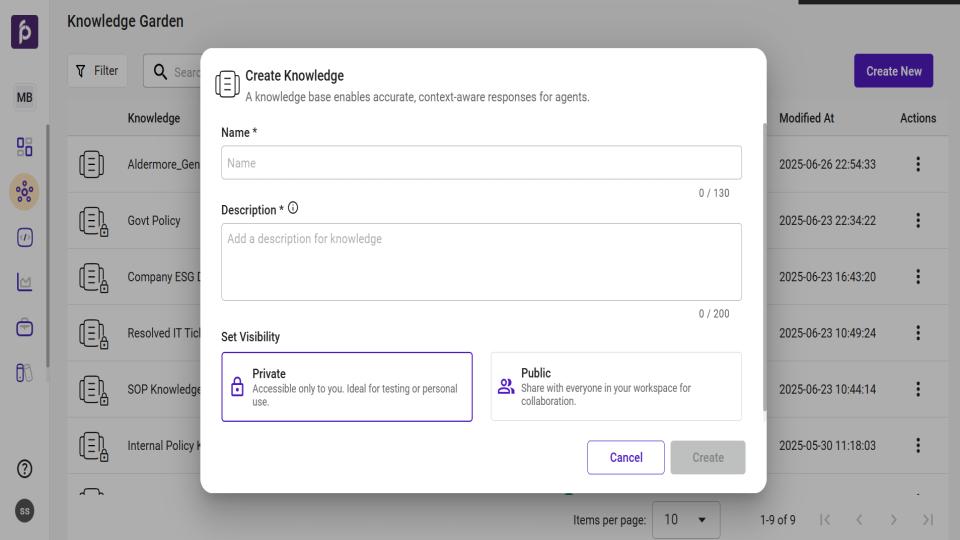
In the "Create Knowledge" window
Enter a unique name for your Knowledge Garden in the "Name" field.
Provide a clear and concise Description for your Knowledge Garden in the designated field.
Set the visibility for your Knowledge Garden by selecting either Private or Public based on your preference.
Click the Create button to finalize the creation of your new Knowledge Garden.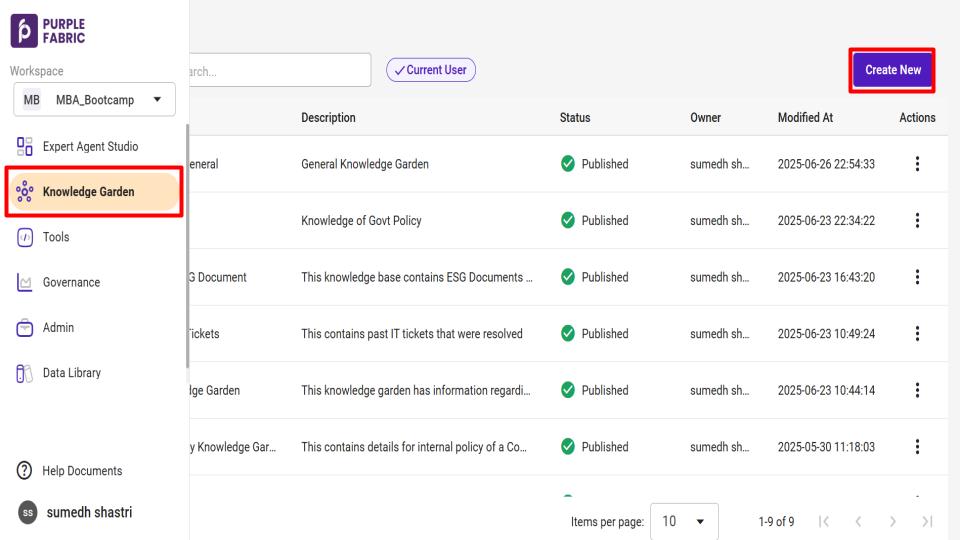
#
#
Step 2: Configure a Knowledge Garden
Follow these steps to configure your Knowledge Garden. This process allows you to define how files are processed and understood within the system.
Navigate to the Settings option, located in the top right corner of the Knowledge Garden interface. A Configuration window will appear.
Within this window, you can perform two primary operations: Chunking and Embedding.
Note: A default chunking and embedding strategy is used, which can be changed using the settings tab. Please be aware that chunking and embedding have an associated cost.
Understanding Chunking
To understand the concept, refer to the Chunking page
Selecting a Chunking Strategy
In the Configuration window, choose the most appropriate chunking strategy for your files:
Block: Select this option to chunk files by logical blocks. This is ideal for files with diverse sections or topics where each block represents a distinct segment requiring individual processing.
Page: Choose this option to chunk files by individual pages. This strategy is appropriate for files with consistent and uniform content, ensuring even distribution and manageable sections.
Extraction Options
Enable for table extraction: To extract structured data from tables within your file, activate the "Enable table extraction" option. This feature is designed to identify and process tabular layouts, ensuring that data organized in rows and columns is accurately retrieved and made available for further use.
Enable for image extraction: To extract visual elements embedded in your file, such as diagrams, or Images, enable the "Enable image extraction" option. This function facilitates the retrieval of all image based content for your use.
**
Understanding Embedding**
To understand the concept, refer to the Embedding page
In the same Configuration window, select the most appropriate embedding model to convert the chunks into their numerical vector representation:
Azure OpenAI Text Ada 002
BGE Large
Azure OpenAI Text Embedding 3 Small
If you do not see any models, you can onboard them using the Model Hub
Saving Configurations
After selecting your required chunking strategy and embedding model, click Save to apply your changes.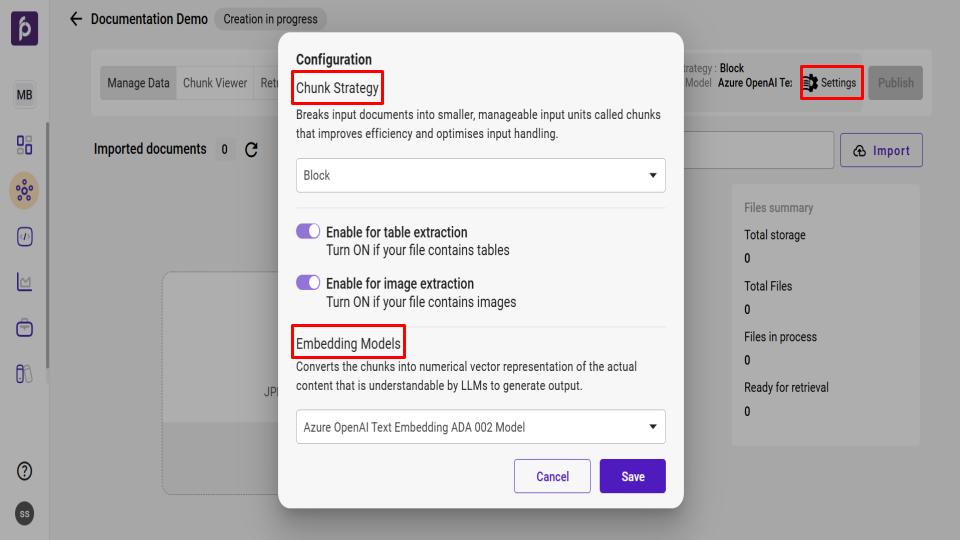
#
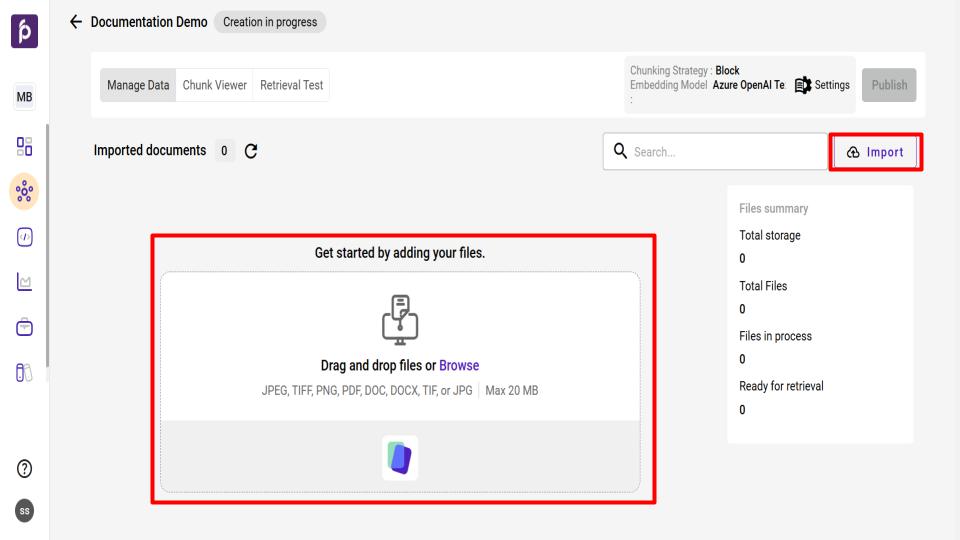
Step 3: Import files to Knowledge Garden
Follow these steps to import your files into the system:
The main section of the interface displays a prompt: "Get started by adding your files."
You have two options for importing files:
Drag and Drop: Drag your desired files directly from your computer and drop them into the designated area (indicated by "Drag and drop files or Browse").
Browse: Click on the "Browse" link within the specified area to open a file explorer window and select your files.
Ensure your files meet the following criteria:
Accepted File Types: JPEG, TIFF, PNG, PDF, DOC, DOCX, TIF, or JPG.
Maximum File Size: File size should not exceed 20 MB, with images having a limit of 5 MB
As soon as your files are uploaded, the configured chunking and embedding processes will automatically begin. You will then be able to view the number of generated chunks, the status of the files, and other relevant processing details within the interface.
Note: Upon successful import, the "Imported files" counter will update, and the "Files summary" on the right will reflect the total storage, total files, files in process, and files ready for retrieval.
#
Step 4: Metadata/Tagging for chunks
Understanding Metadata
To understand the concept, refer to the Metadata page
Adding Metadata
Metadata can be added to your files through two distinct methods.
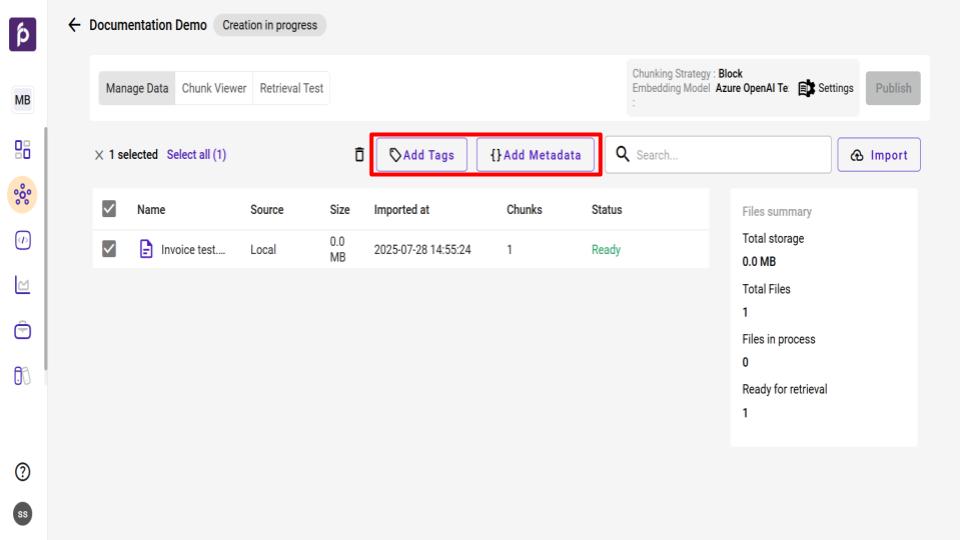
Method 1: Using the Manage Data Tab
This method is suitable for adding metadata to entire files after they have been processed.
Navigate to the Manage Data tab, located at the top of the interface.
From the list of uploaded files, select the file to which you wish to add metadata.
- Ensure your desired files are marked as 'Ready' before continuing, as only files with this status can be used in subsequent steps.
Click the Add metadata button that appears. A Metadata window will open.
In the "Metadata" window, enter the Name and corresponding Value for each metadata field you wish to apply to the chunks within the selected file.
Click Submit. The newly added metadata details will be visible in the Chunk Viewer tab, located at the bottom of the chunks display.
**
Method 2: Using the Chunk Viewer Tab**
This method allows for more granular control, enabling you to add metadata to specific chunks.
Go to the Chunk Viewer tab.
Select the specific chunks where you intend to add metadata.
Click the Add metadata button. A Metadata window will appear.
In the "Metadata" window, enter the Name and corresponding Value for each metadata field you wish to apply to the selected chunks.
Click Submit. The added metadata details will be displayed at the bottom of the affected chunks within the Chunk Viewer tab.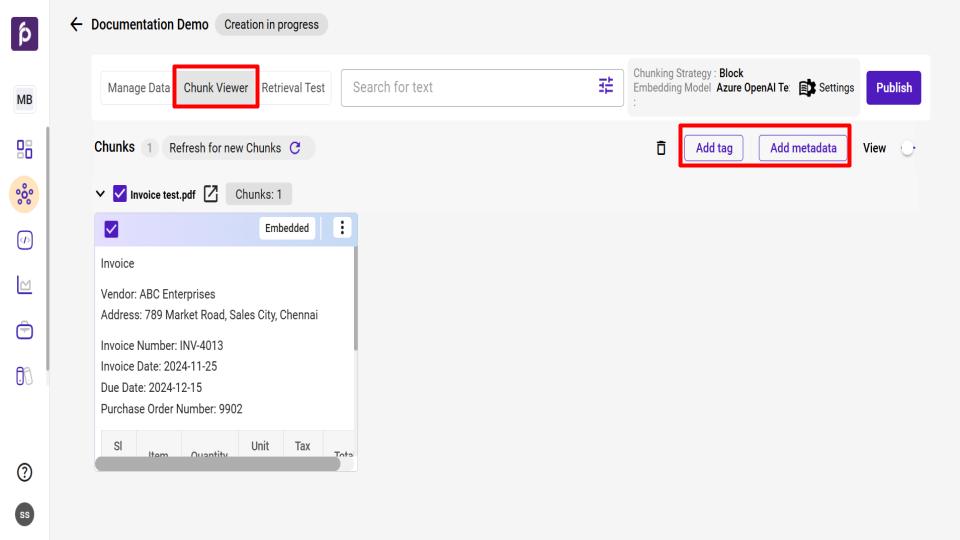
#
#
#
#
Understanding Tag
To understand the concept, refer to the Tagging page
Adding Tag
You can add Tags to to your files using same steps as Adding Metadata
#
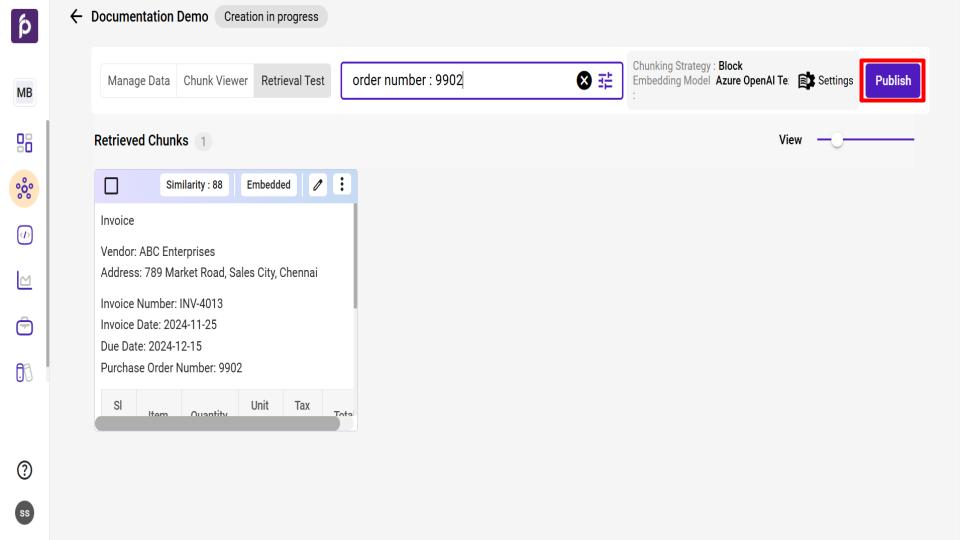
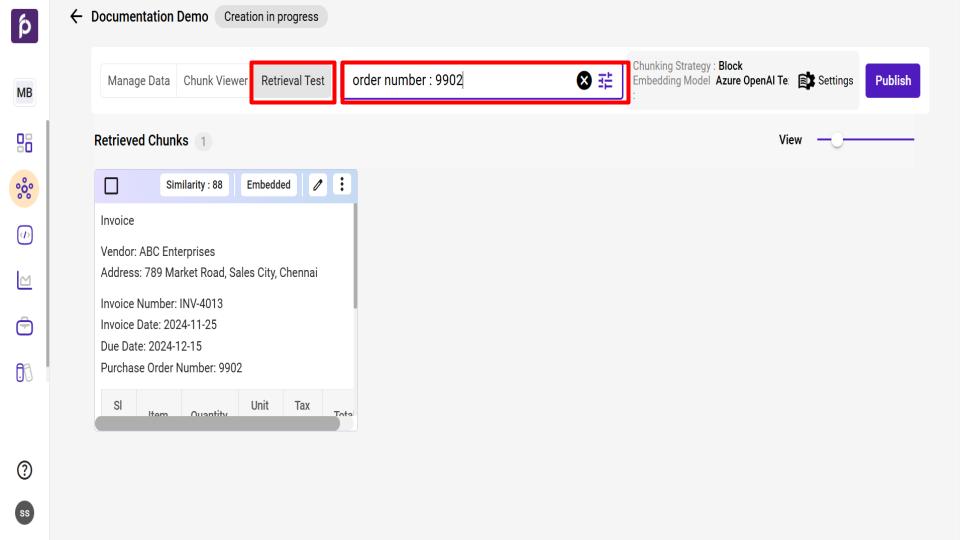
Step 5: Retrieval Testing
Retrieval testing allows you to evaluate how effectively the system retrieves relevant information based on specific queries.
From the main section of the interface, click on Retrieval Testing.
In the Search bar, enter your query and press Enter. The system will display chunks of information relevant to your query.
To refine the displayed chunks, click the Options button. From the available choices, you can:
Adjust Top K to control the number of chunks retrieved.
Select the metadata and tags that are associated with the chunks for improved filtration.
Click Apply to view the filtered chunks.
Note: It is suggested to add metadata or tags to chunks. This practice can significantly enhance retrieval accuracy and accelerate processing when utilizing Knowledge Garden.
#
Step 6: Publish a Knowledge Garden
If the desired Knowledge Garden has been created, click the Publish button. The newly published Knowledge Garden can then be accessed within the Knowledge Garden Tab.